NHM Pinned Insects - Label Removal (Single Camera Workflow)
Table of contents
Overview
This page details the steps involved in the pinned insect label removal digitisation workflow used at the Natural History Museum, London (previously known as the ‘iCollections’ workflow). This workflow produces images of a pinned insect specimen, as seen from above, with its associated labels laid out to the right handside (image captured using a single camera setup).
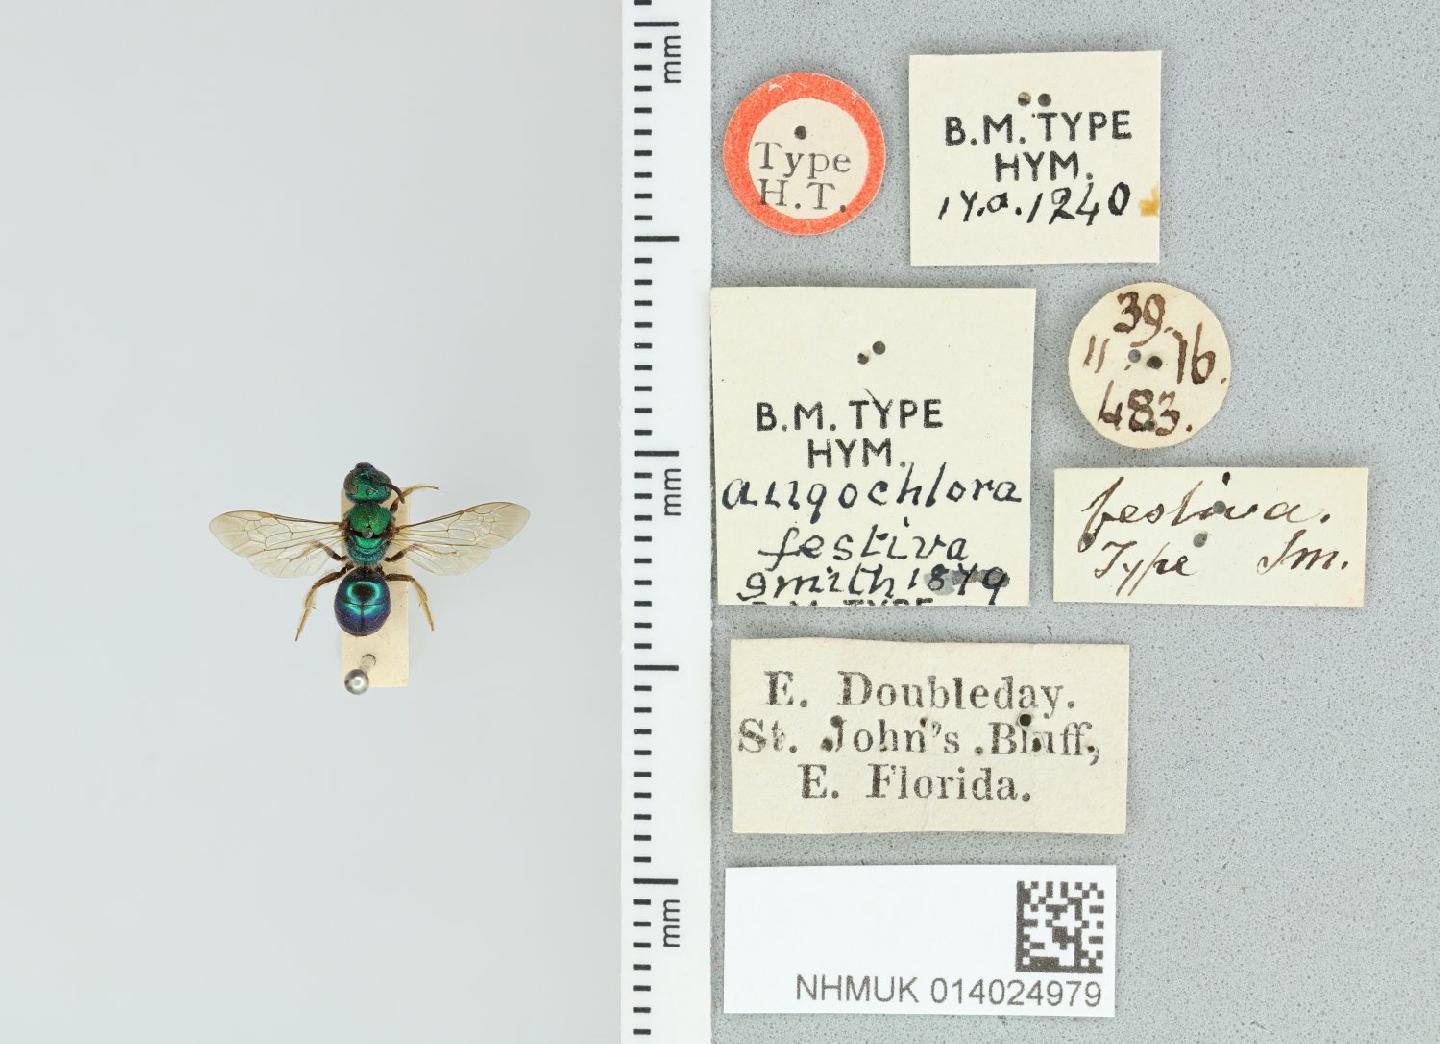
Figure 1: Augochlora (Augochlora) festiva (http://creativecommons.org/licenses/by/4.0/)
Workflow
This workflow occurs in two separate stages.
- Specimens are taken from the collections in drawers for re-housing and curation. During this stage, a unique barcode is attached to the pin of each specimen. A record is created stating that that barcode is associated which that species, but no other information is collected. Records can be created in bulk if there are many specimens per species.
- Specimens are imaged. The specimen’s labels and barcode are included in the image which allows information about the specimen to be gathered and link the image to the specimen record.
Image Capture
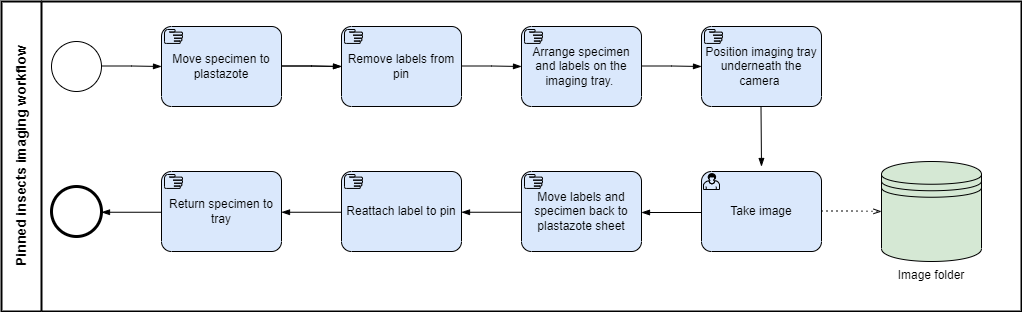 Figure 2: Workflow diagram for the imaging of pinned insect specimens.
The imaging process takes place using several steps, where the specimen in passed between three locations:
- Its permanent location in its drawer tray.
- A plastazote sheet where specimen handling is performed.
- An imaging tray where the specimen and labels will be laid out for imaging.
First the specimen to be imaged is moved from is permanent location in the tray to the plastazote sheet. The specimen’s labels are then carefully removed from the pin using forceps, and laid out in order on the sheet.
The specimen is next transferred from the plastazote sheet to the middle of the imaging tray.
The labels are placed on the right hand side of the specimen on the imaging tray, usually on a raised level so that the pinned specimen and the labels are at the same distance from the camera. This ensures that all parts are in focus.

Figure 3: Example layout of specimen and labels.
Once the specimen and labels are in place, the tray is moved into the imaging station and orientated so that it is the correct way up for the camera. We preview the image using the live view from the tethering program on our computer.
If there is additional information on the reverse side of the labels we take a second image of these.
We then reverse the process: we move the specimen back onto the plastazote sheet. Labels are moved with forceps and laid out on the sheet as before. The labels are then reattached to the pin in the same order as they where originally found, by sliding the pin through the pre-existing holes.
Once complete, the specimen is returned to its location in the tray.
Image Processing
Image processing is performed at the end of the day once all specimens have been imaged.
The processing involves using the unique barcodes associated with each specimen to re-name the images. The images are initially given generic names due to the order in which the image was taken. By re-naming the images we are able to identify each image and link the image to other information in the specimen’s digital record.
To perform the re-naming step we use the program BardecodeFiler. More instructions can be found in our Software page.
Requirements
Hardware
Canon Eos 5D Mrk IV DSLR camera
Kaiser RS1/RS10 copy stand
Light box - 250mm x 415mm x 330mm (h x l x d).
Software
Canon EOS Utility software
BardecodeFiler
Camera Settings
ISO = 500; shutter speed = 1/60; aperture = f/10.
Authors
Michael Jardine, Peter Wing, Phaedra Kokkini, Nicola Lowndes Natural History Museum


Contributors
Authors are those who directly prepared this guide, however this workflow builds upon the working practices and insights of numerous colleagues over many years, particularly Louise Allan, Vlad Blagoderov, Robyn Crowther, Lisa French, Kate Holub-Young, Krisztina Lohonya, Geoff Martin, Larissa Welton and previous members of the digitisation and iCollections teams (Natural History Museum). The creation of this guide was funded by the UK Arts & Humanities Research Council.
References
Blagoderov et al. 2017. iCollections methodology: workflow, results and lessons learned
Licence
The content of this workflow is the property of the Trustees of the Natural History Museum and may be used under a creative commons licence
Citation
Jardine, M.D., Wing, P., Kokkini, P. and Lowndes, N. (2022) DiSSCo Digitisation Guide: NHM Pinned Insects - Label Removal (Single Camera Workflow). version 1.1. Available at: https://dissco.github.io/PinnedInsect/NHM%20single%20camera%20pinned%20insects.html
Document Control
Version: 1.1
Changes since last version:
- Removed instructions on how to use BardecodeFiler, which is now found on its own software page.
- Minor edits to text
- Page title changed
Last Updated: 2 August 2023
Edit This Page
You can suggest changes to this page on our GitHub