NHM Herbarium Sheet Mass Digitisation
Table of contents
Overview
This workflow covers the steps involved in the digitisation and imaging of herbarium sheets as performed at the Natural History Museum, London. In this process a digital record is created for each specimen with an attached barcode. The record is then later supplemented by producing an image of each specimen.

Figure 1: Two examples of herbarium sheet specimens, left - Malcolmia littorea; right - Vigna umbellata.
Workflow
Pre-Digitisation Curation
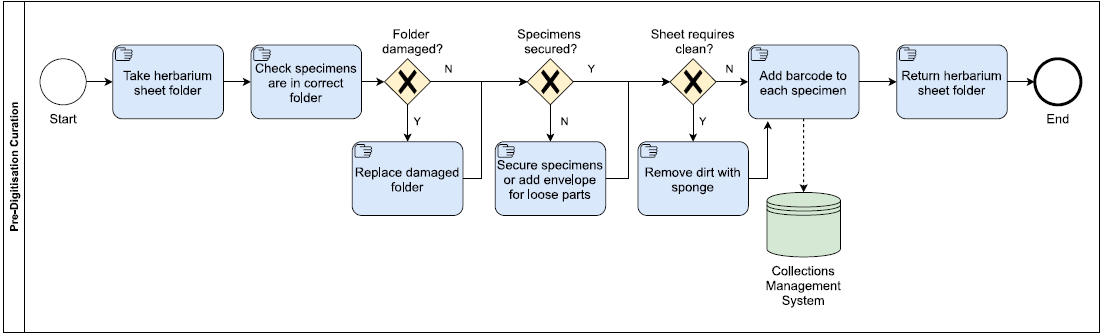
Herbarium specimens are checked and prepared before creating specimen records and imaging. Herbarium sheet specimens are kept in folders. Folders are split by genus and by geographical area. A folder typically contains only one species, but a species may run over several folders.
When we retrieve a folder we check that the correct specimens are included in that folder, i.e. that all specimens are of the same species and geographical area as indicated on the folder’s cover. Issues are raised with the curators.
We the check that the specimen sheets themselves are in decent condition. For this we:
1) Replace ripped or damaged folder or specimen covers with new ones - copying out the necessary labels.
2) Ensure that the specimen is securely fastened to the sheet and does not extend beyond the edge of the sheet. If need we add paper strips to hold the specimen in place.
3) Use a sponge to remove dirt from the sheet (dust, debris, smoke damage etc.). This makes the image clearer and the specimen more presentable.
4) Add a paper envelope to the sheet for any part of the specimen that comes loose.
The aim of these steps is to ensure that the specimens are in the best condition before imaging and that the specimens we are imaging are in the correct folders.
A barcode is then added to the sheet for each specimen. These barcodes are unique and allow us to identify each specimen electronically. Barcodes are added to the sheet in the top left corner, fingers width in from each side, and at least this distance from any of the specimens. If this is not possible, the barcode is placed either along the top or the bottom of the sheet. Barcodes are aligned horizontally.
Some sheets contain multiple specimens. If this is the case, a barcode is added for each specimen. We make sure that it is clear which barcode relates to each specimen. We do this by either adding barcodes next to the label of each specimen, or by indicating to which specimen the barcodes belongs by using letters or numbers.
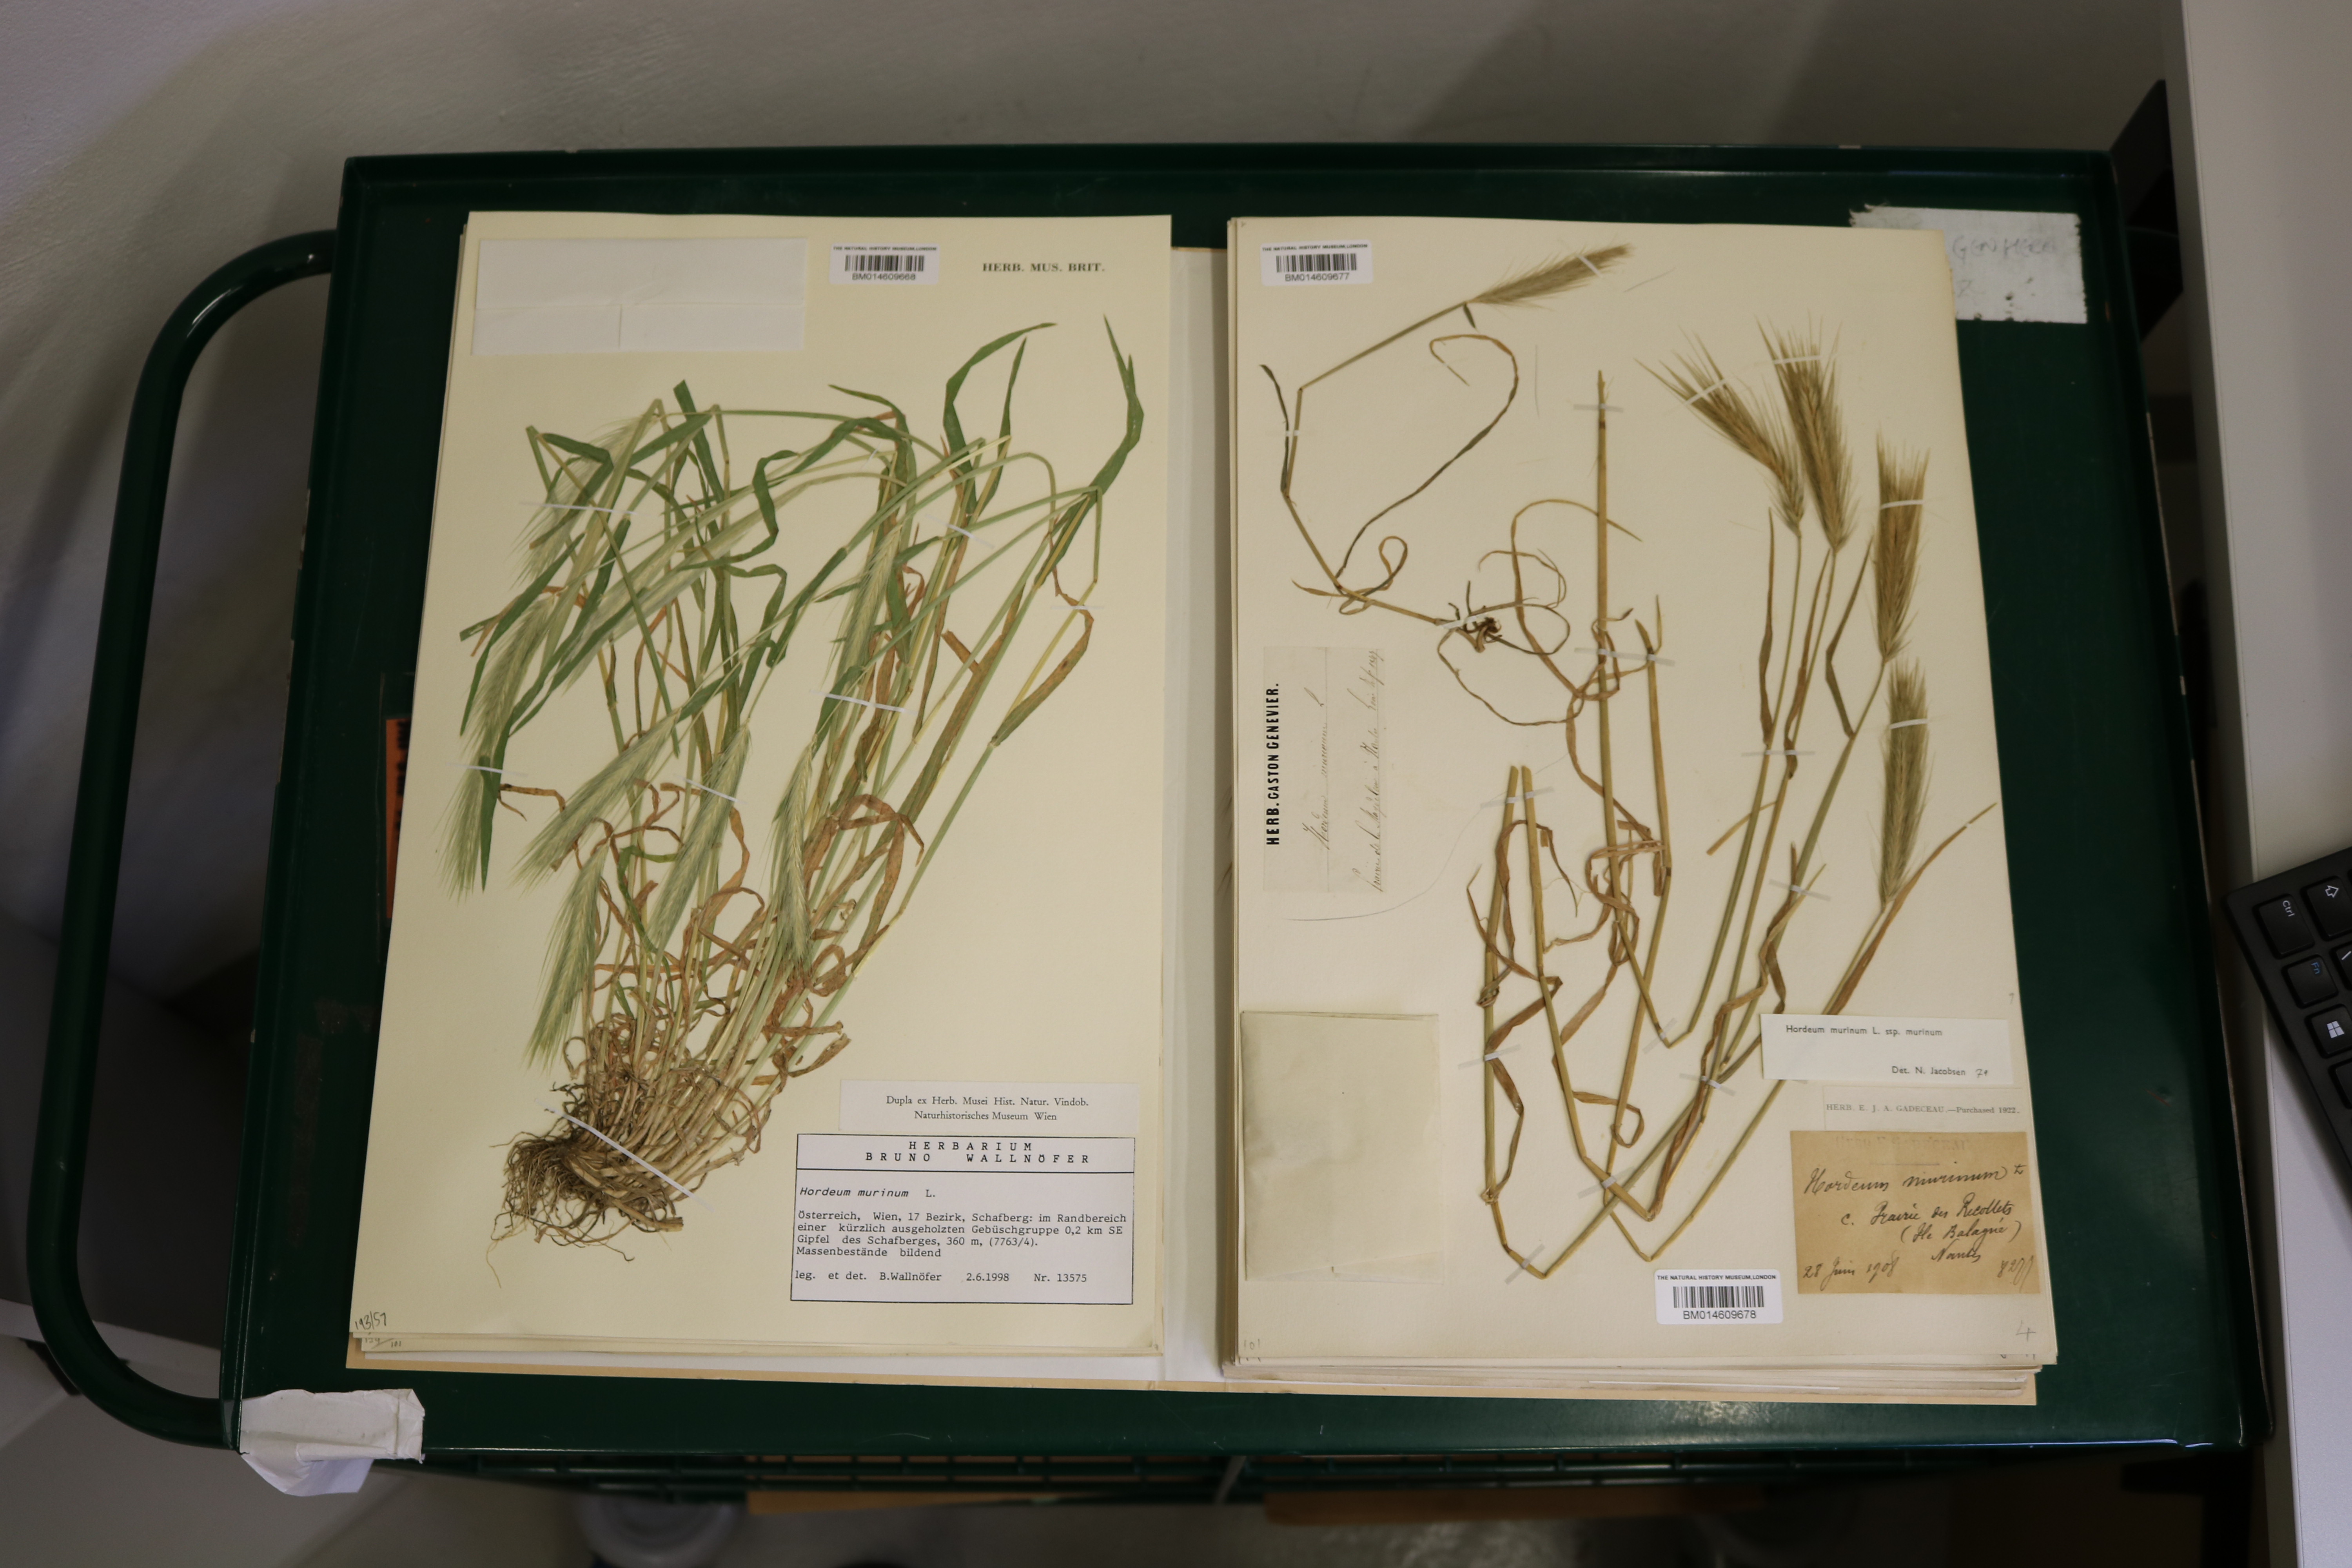
Figure 2: Two herbarium sheets. The one on the left contains one specimen so has one barcode, while the one on the right contains two specimens and is given two barcodes. Barcodes are added next to the specimen labels.
Image Capture
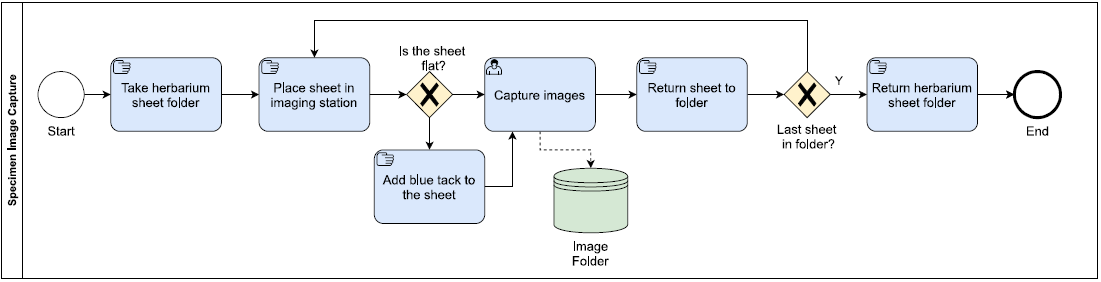
The set up for this digitisation workflow looks like this:
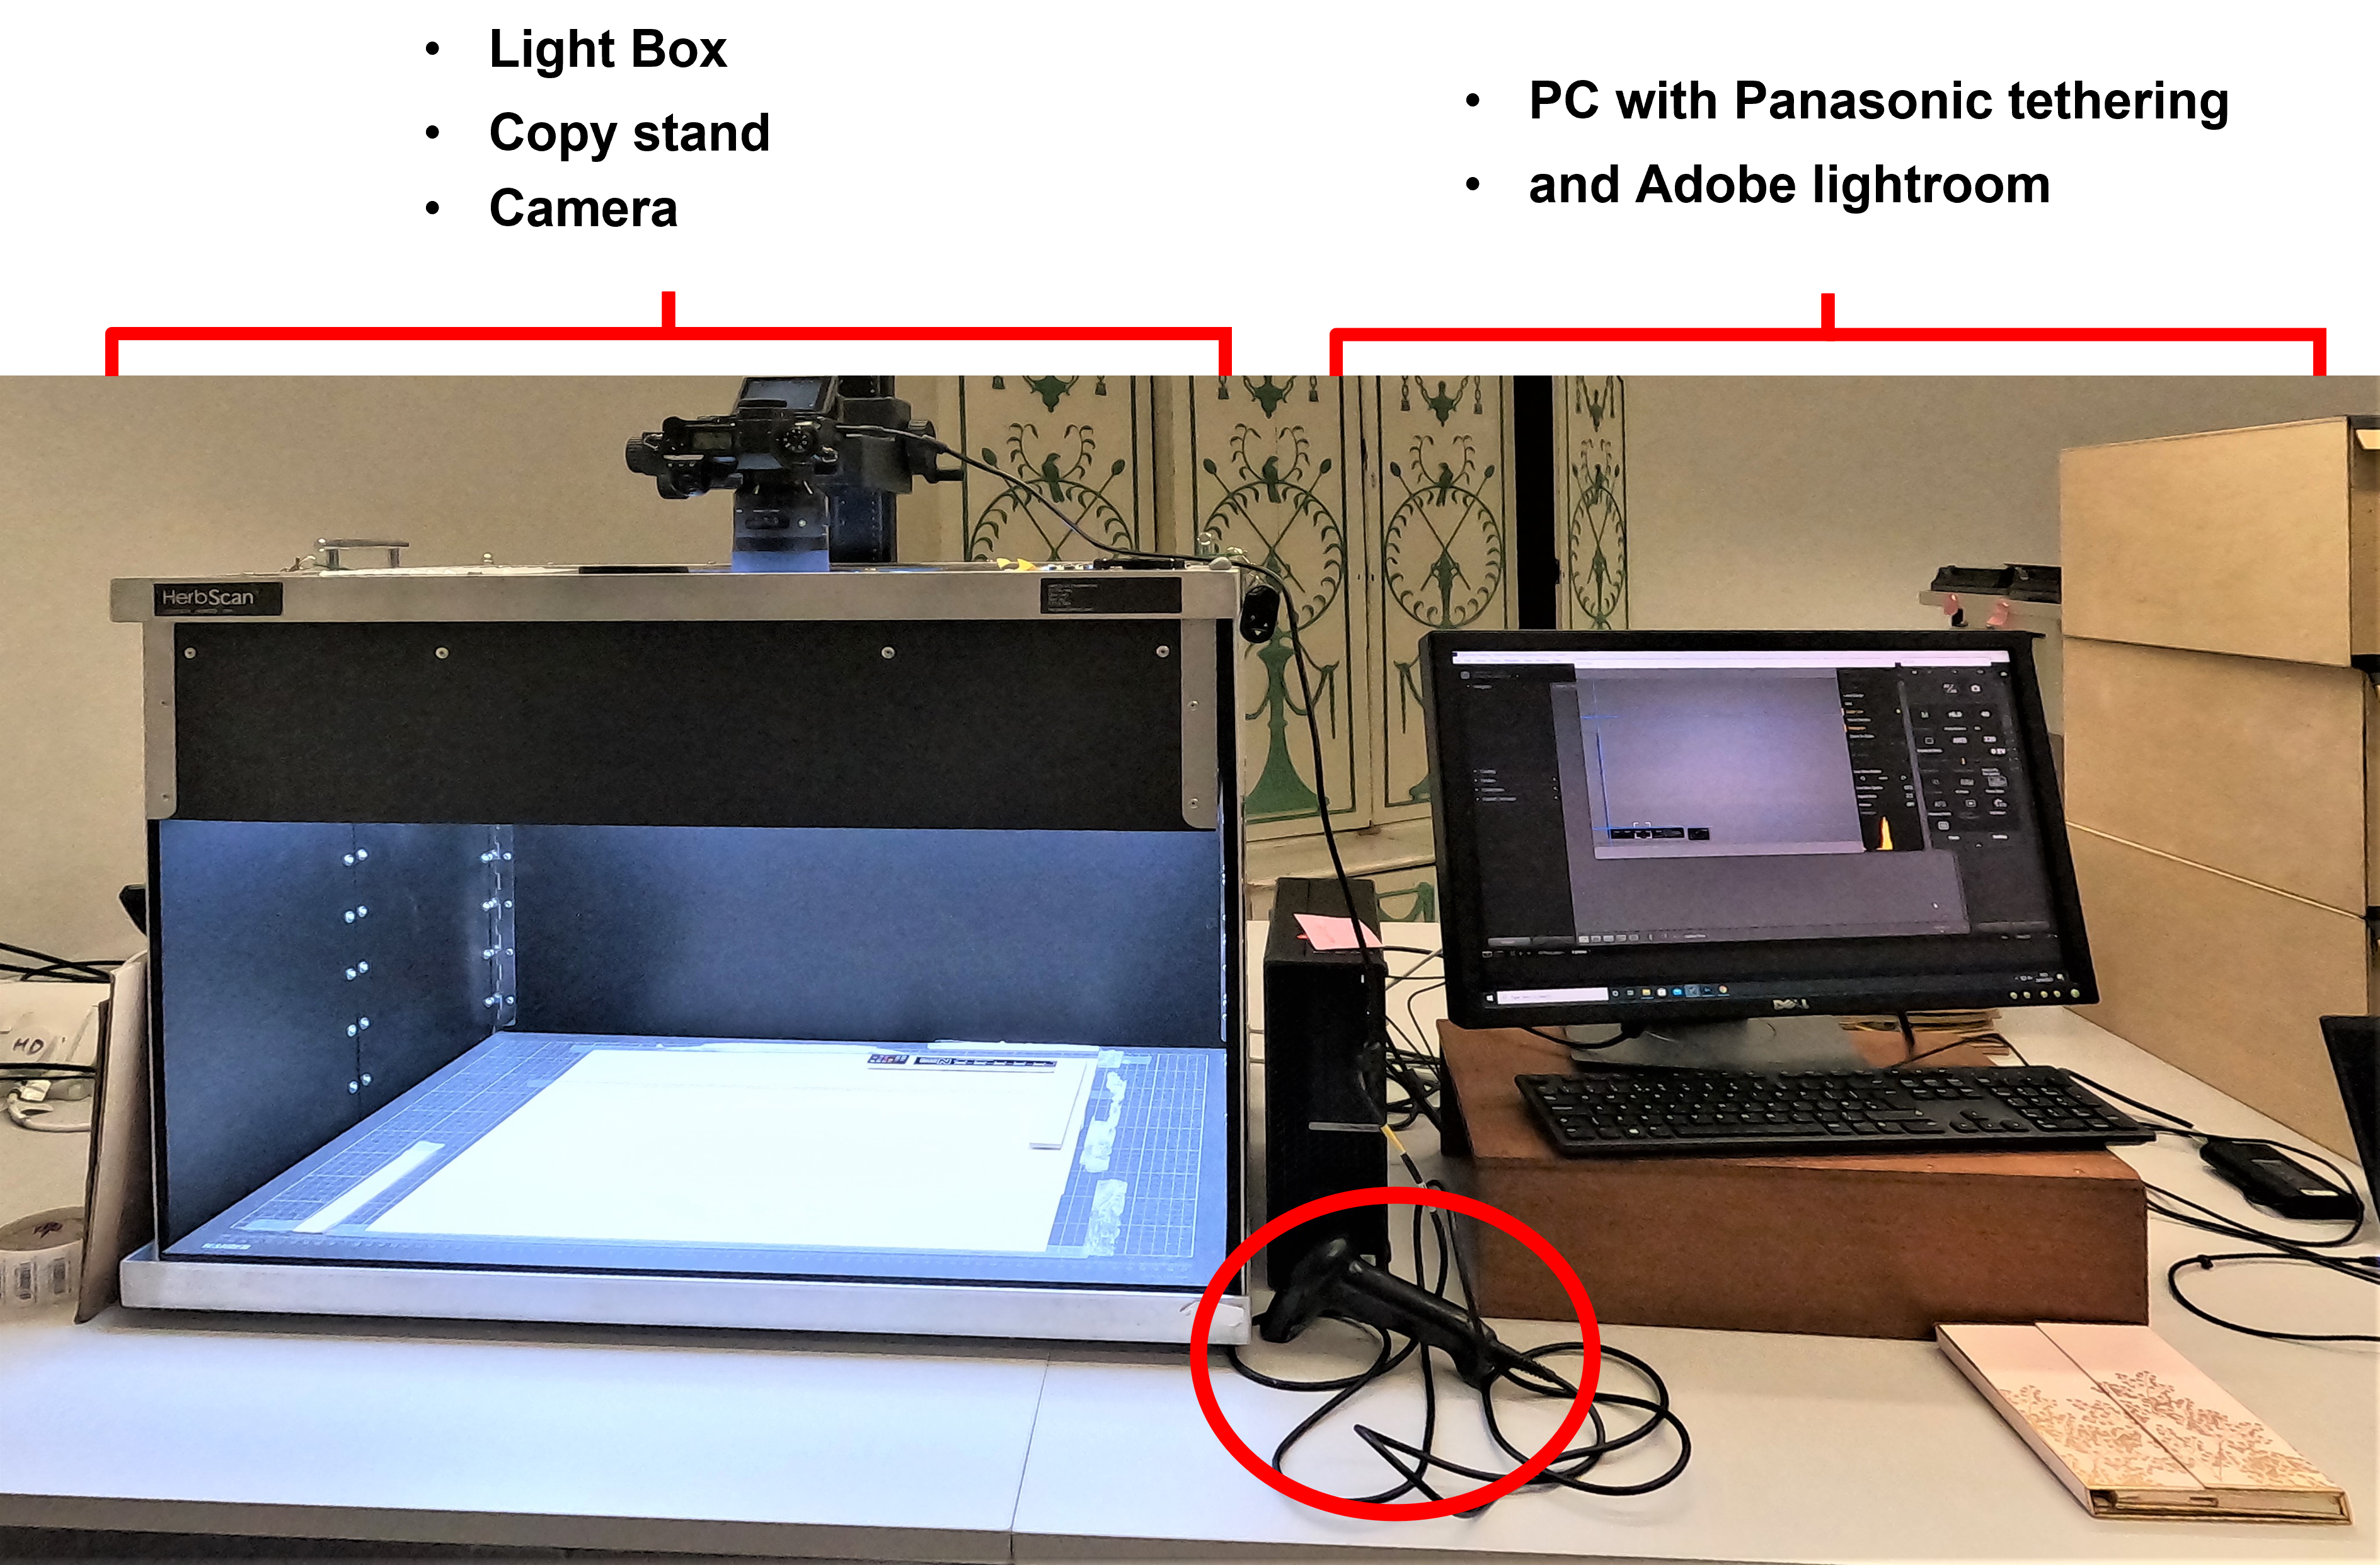
Figure 3: Herbarium sheet digitisation setup. On the left is the imaging station where the specimen will be placed and photographed. On the right is a computer with a number of programs installed. Circled in red there is a barcode scanner which is attached to the computer with a USB.
Inside the imaging station we have some other pieces of equipment.
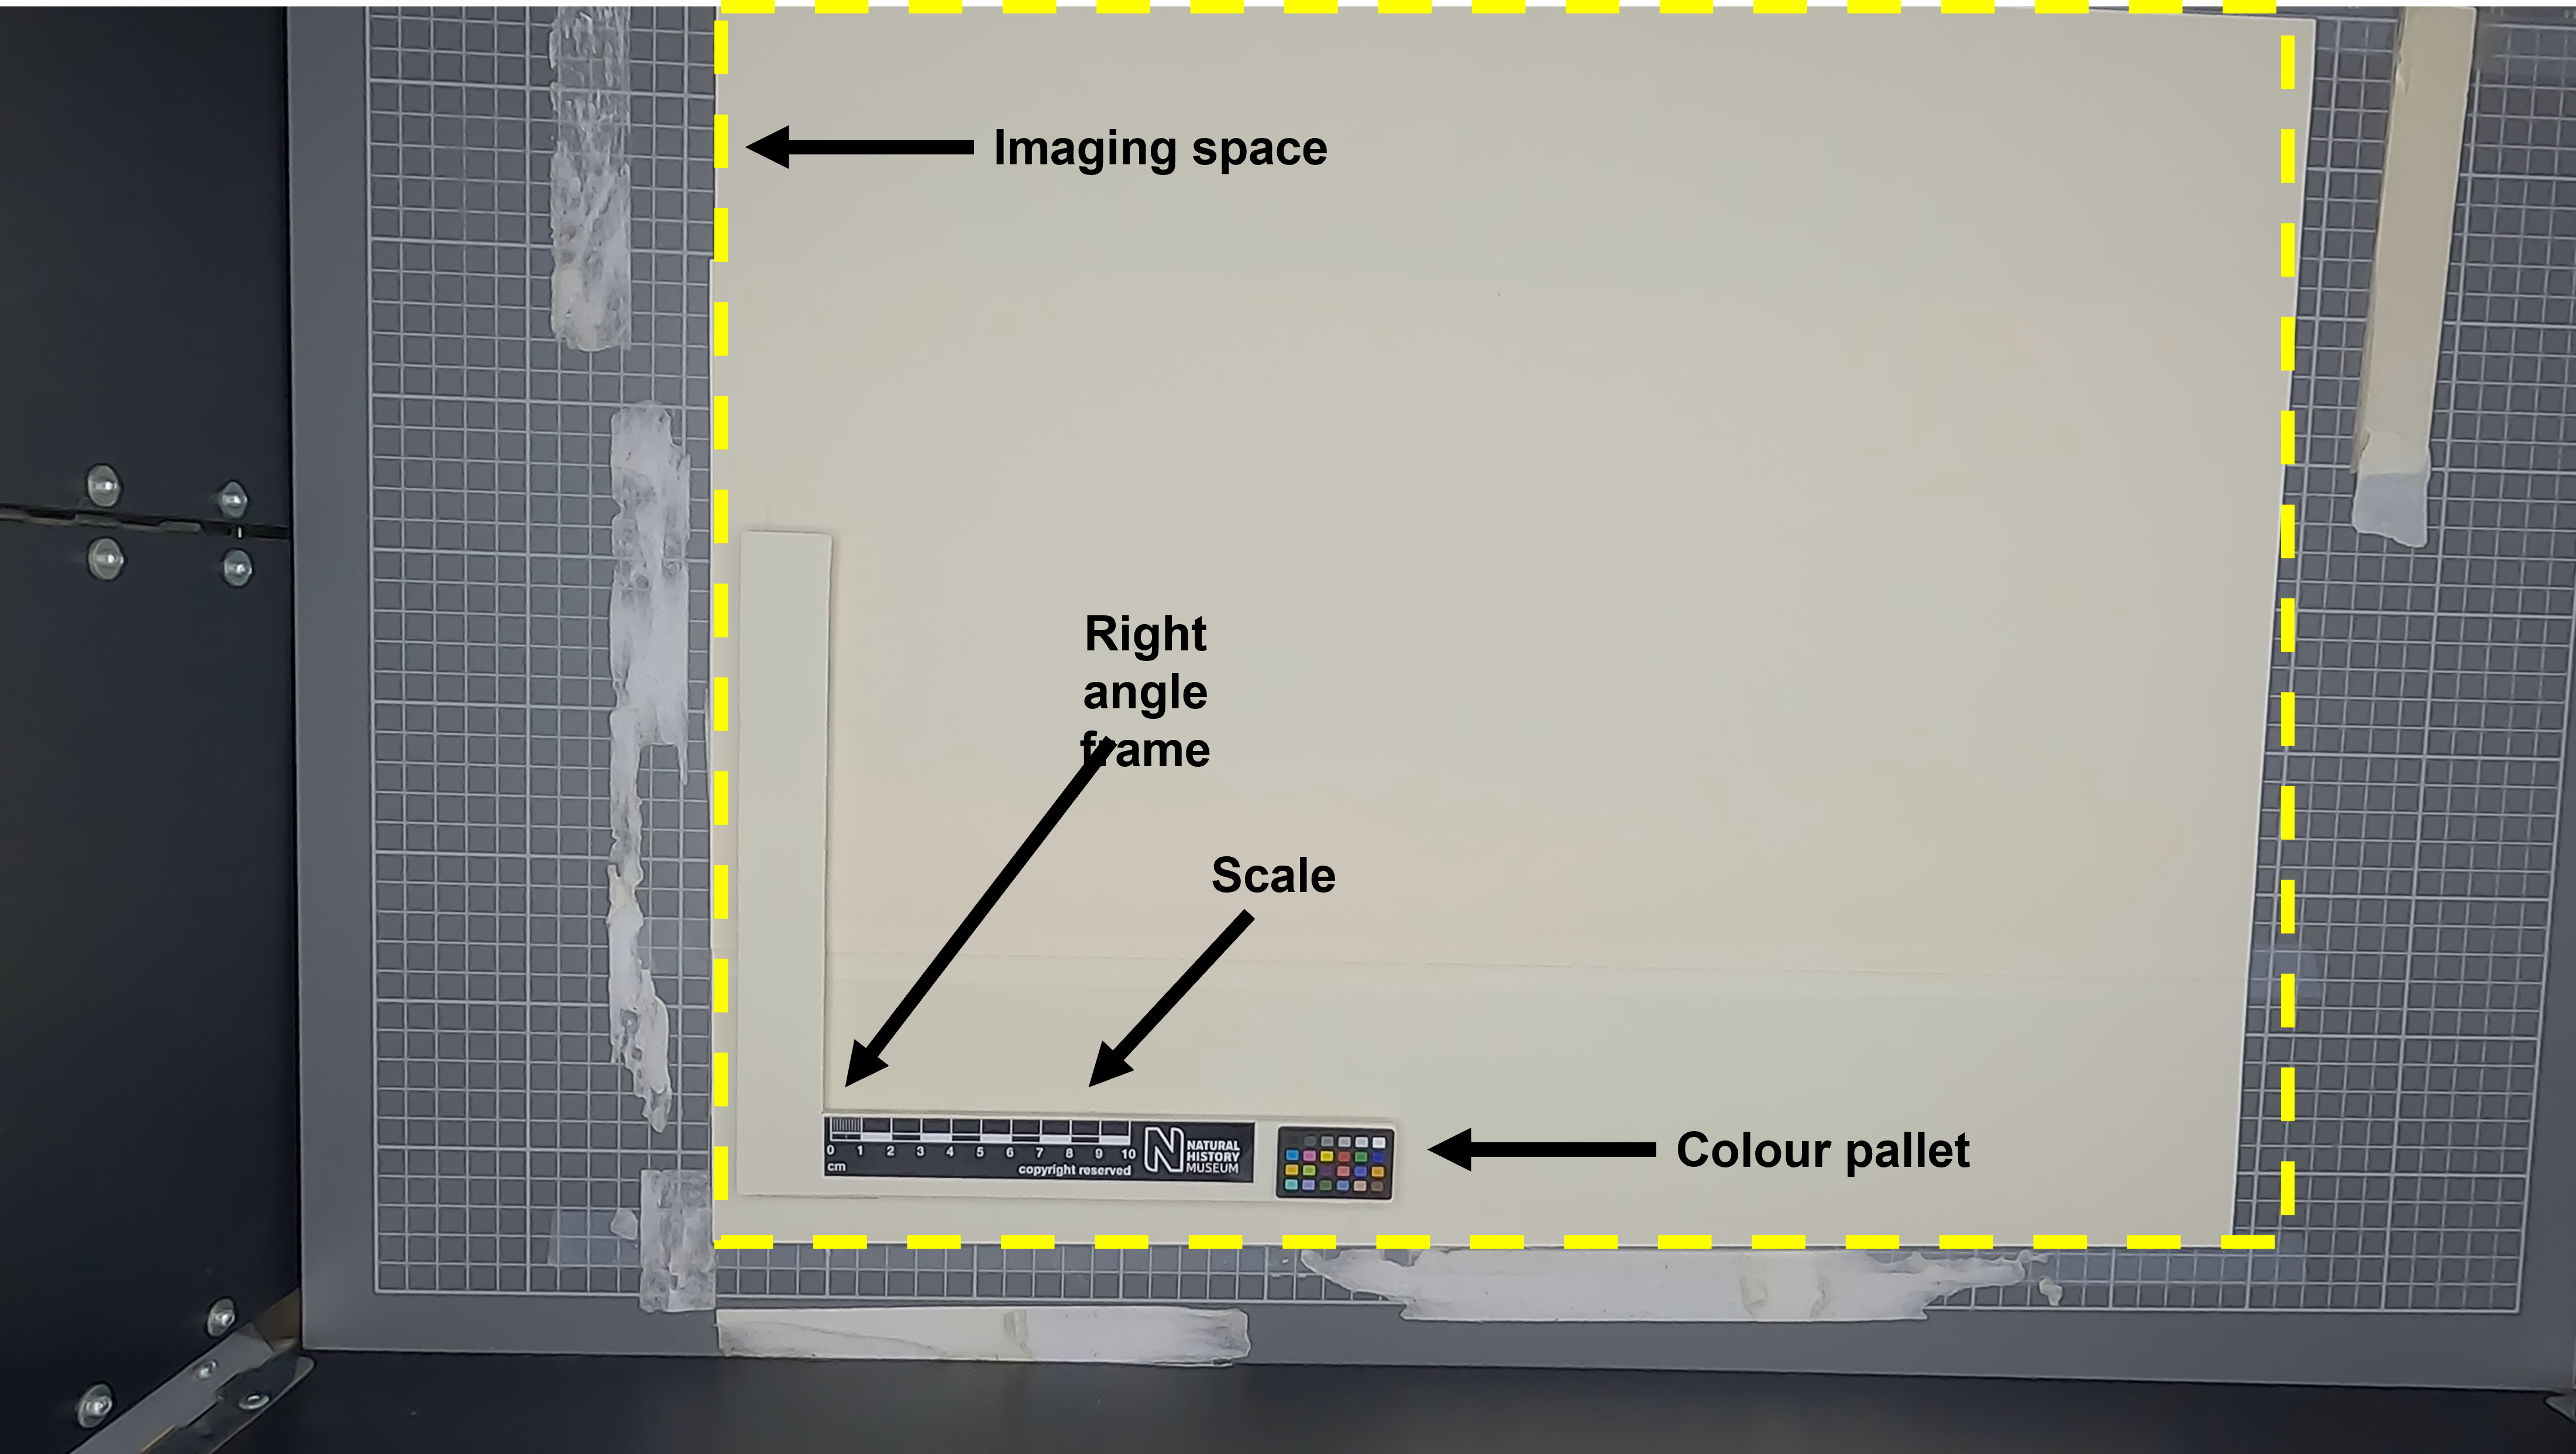 \
\
Figure 4: This shows the imaging set up from the same point of view as the camera. These items are used for the positioning, scaling, and colour of the specimens.
Details of the kit used in this setup is included under Hardware.
The sheet is placed into the imaging station, with the top of the sheet on the left side of the cameras view. The top left corner is fitted to the right-angled frame to keep the sheet in a stable and consistent position.
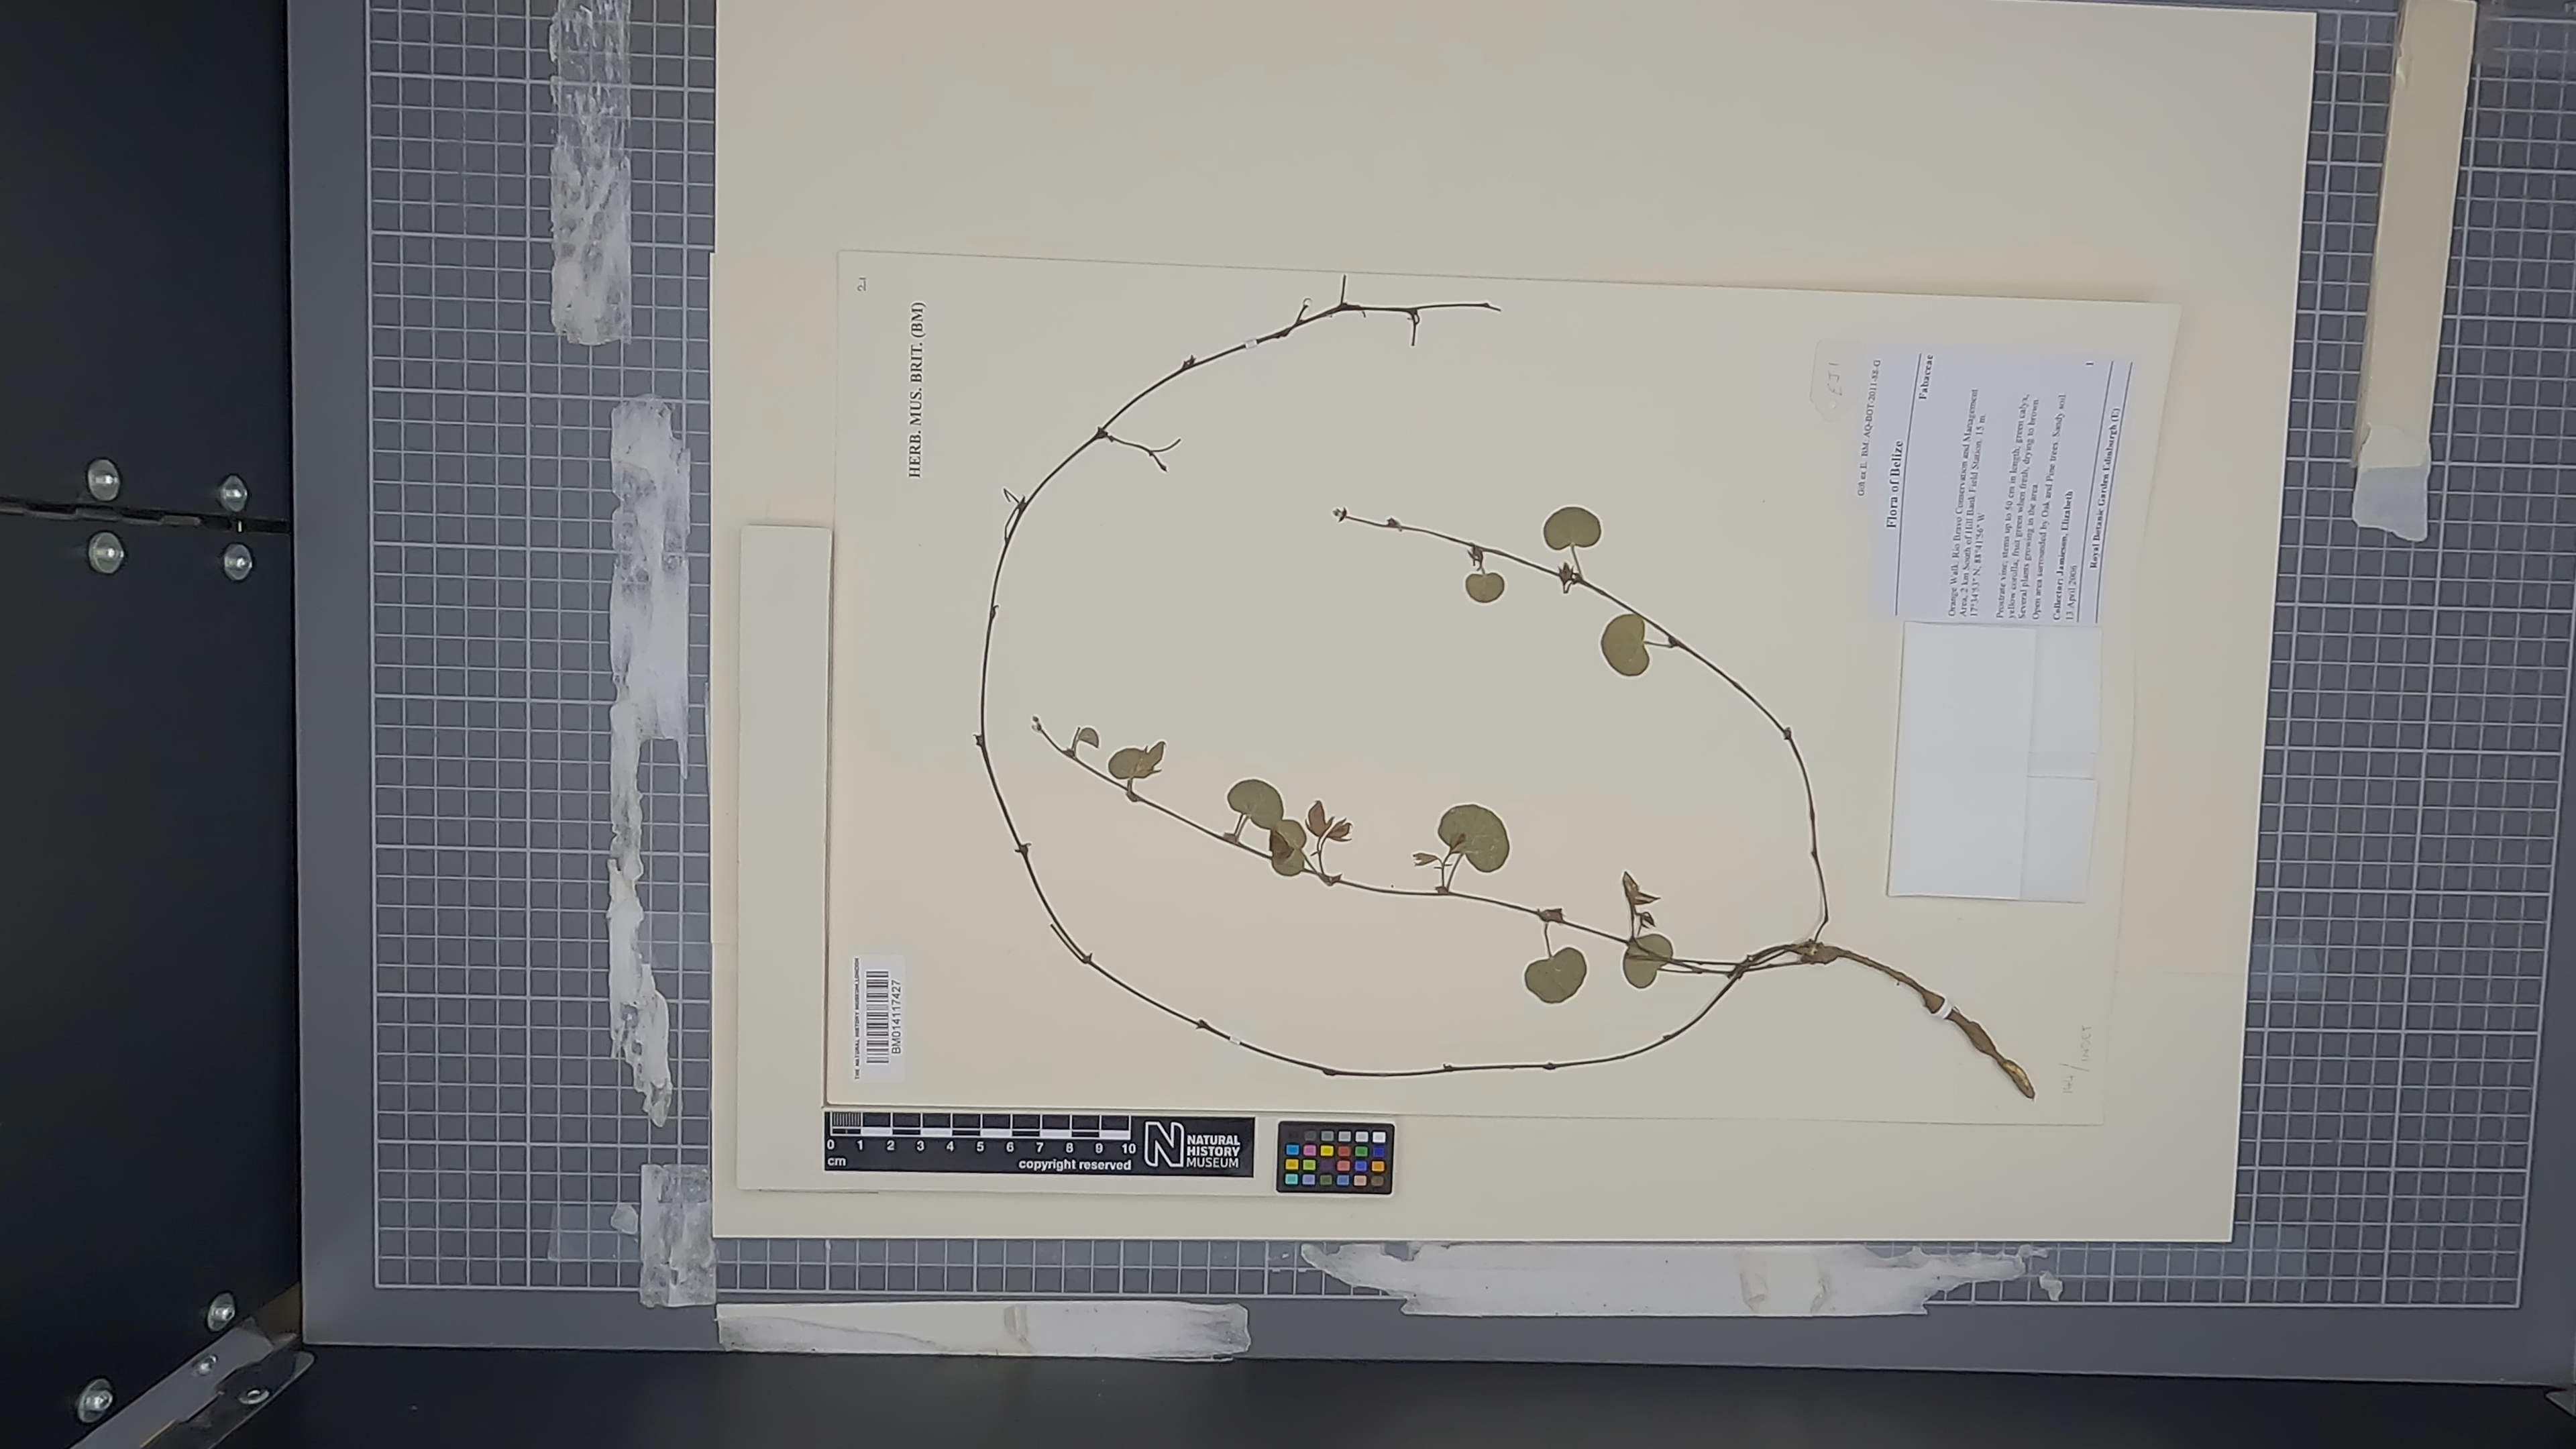
Figure: specimen sheet in position in the imaging station as seen from the cameras eye view.
Many herbarium sheets do not lie flat since sheet are usually stacked together and the plant specimens warp the paper. You can use a small (pin head sized) amount of blu tack to fix down any corners that stick up. It doesn’t matter if the sheet is completely flat, but a flatter sheet is better than a wavy one.
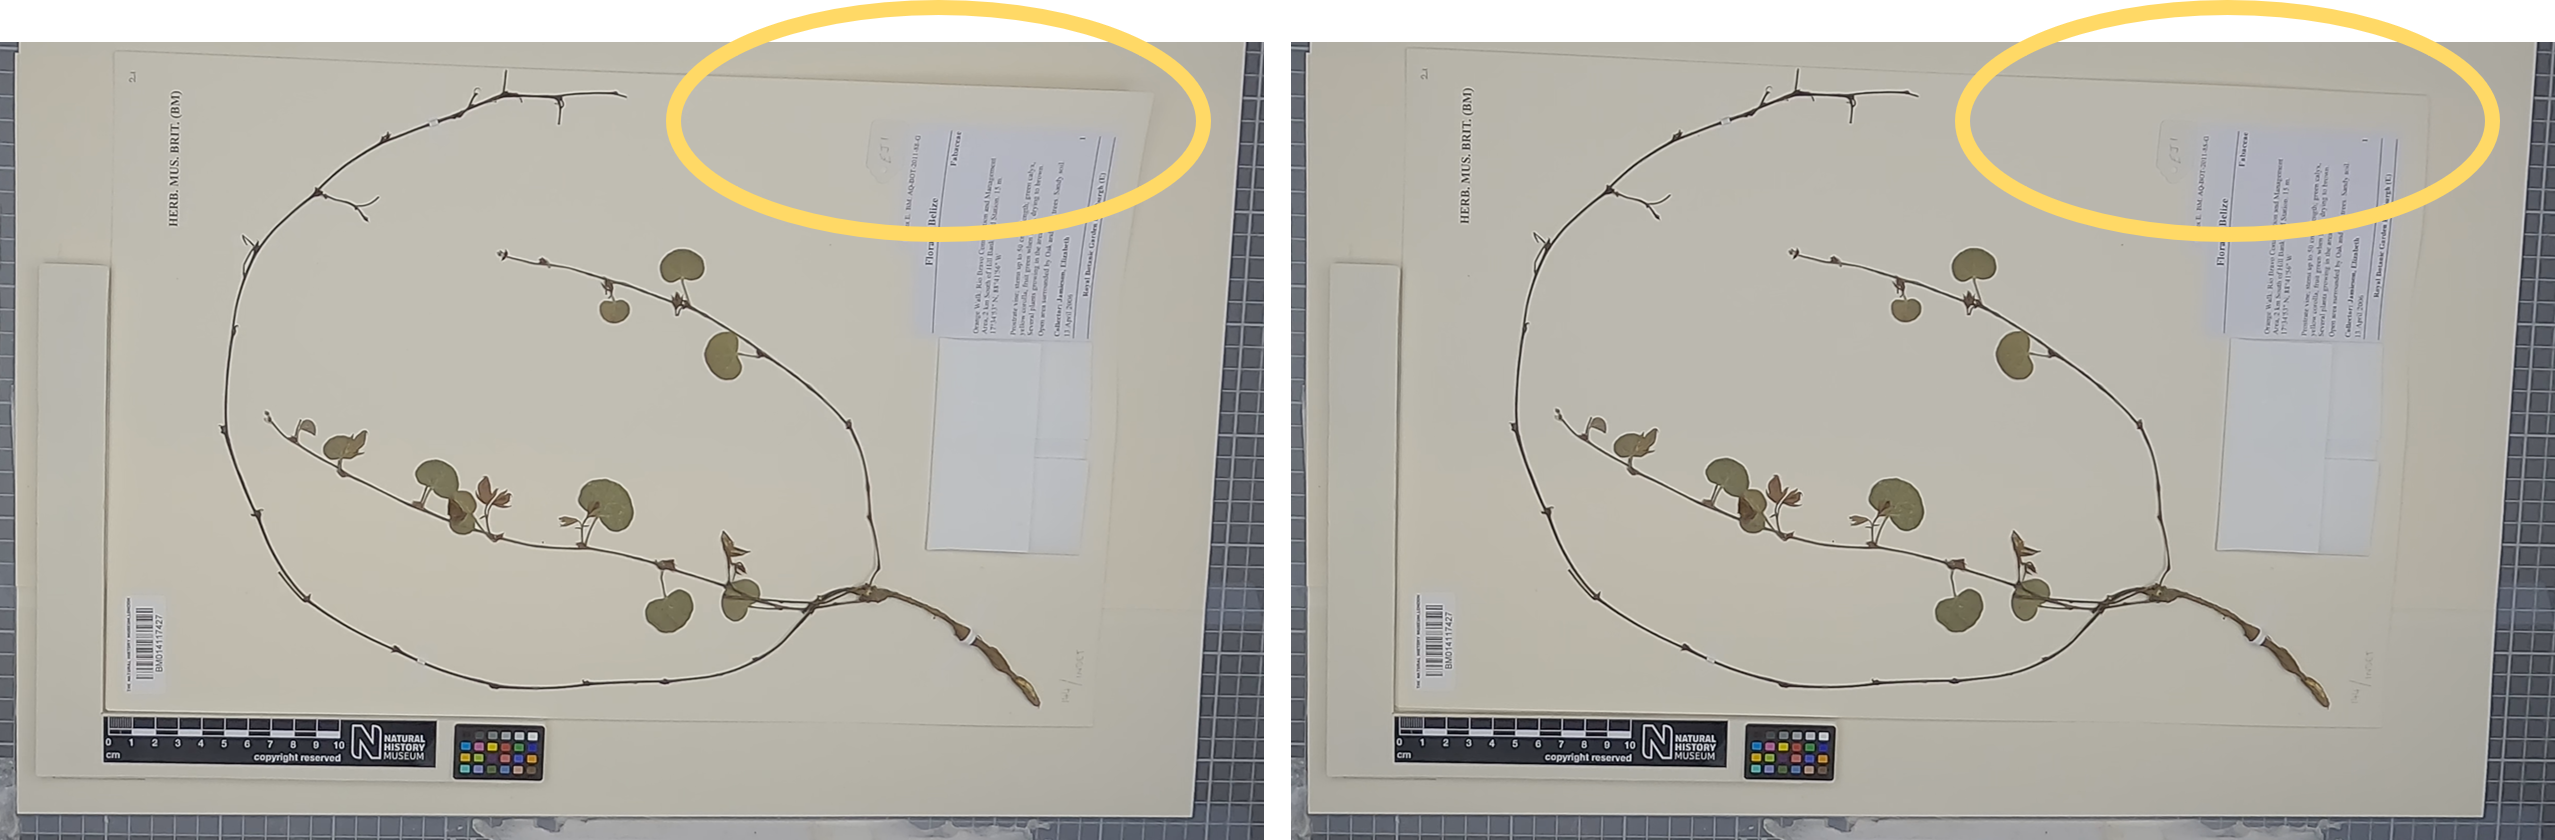 Figure 5: Shows the use blu tack to help flatten sheets, before (left) and after (right). This will help improve the readability of the label when imaged.
Image Processing
Once you have taken images of all your specimens for the day, there are a number of final steps required before the images are ready to be linked with their digital records and to be published and shared. These steps are:
-
Rotating images: We rotate our images so that the top of the sheet is at the top of the screen.
-
Cropping: We crop the images to remove the space at the top of the bottom of the image which does not include any of the herbarium sheet. This focuses the image on the specimen, partially reduces file size, and standardises the dimensions of the image.
You can access our step by step instructions on how to use Adobe Lightroom in our Software pages.
Example Projects
Lohonya et al. 2020. Georeferencing the Natural History Museum’s Chinese type collection: of plateaus, pagodas and plants - This paper uses a previous incarnation of this workflow and covers the difficulties in georeferencing samples from non-English speaking countries and how this changes overtime.
Requirements
Hardware
Panasonic Lumix S1R mirrorless camera
Windows PC with attached screen
Barcode scanner with USB cable
Colour palate - Calibrite ColorChecker Classic Nano
Scale bar
Copy stand composed of:
- Kaiser base board - 800mm x 600mm
- Kaiser 1.2m column
- Kaiser RTP arm
Light box - 640mm x 830mm x 646mm (h x l x d). - 200x200mm square 315mm from either side and 171mm from the front.
- Recess at the back for the rail. 355mm from either side (120mm wide itself) depth = 105mm (leaving a gap of 170mm between that and the square cutout).
Fluorescent or LED lights or the light box
Software
Panasonic Lumix tethering program
Adobe Lightroom Classic
Camera Settings
Using a Panasonic Lumix S1R camera the settings differ slightly depending on the light source used in the light box.
If using fluorescent lighting the settings are: ISO = 320; shutter speed = 1/40; aperture = f/6.
If using LED lighting the settings are: ISO = 200; shutter speed = 1/60; aperture = f/6.5.
Authors
Michael Jardine, Krisztina Lohonya, Larissa Welton, Lisa French. Natural History Museum


Contributors
Authors are those who directly prepared this guide, however this workflow builds upon the working practices and insights of numerous colleagues over many years, particularly the NHM Algae, Fungi & Plants team and previous members of the digitisation team. The creation of this guide was funded by the UK Arts & Humanities Research Council.
Citation
Jardine, M.D., Lohonya, K., Welton, L. & French, L. (2022) DiSSCo Digitisation Guide: NHM Herbarium Sheet Mass Digitisation. version 1.2. Available at: https://dissco.github.io/HerbariumSheets/NHMHerbariumSheetDigitisationWorkflow.html
Licence
The content of this workflow is the property of the Trustees of the Natural History Museum and may be used under a creative commons licence
Document Control
Version: 1.3
Changes since last version:
- Removed detailed instructions on specific software, it now links to a separate page with these instructions.
- Added workflow diagrams for pre-digitisation section and specimen image capture.
- Minor amendments to text
- Logos added
- Contributors updated
Last Updated: 25 July 2023
Edit This Page
You can suggest changes to this page on our GitHub