7. Photography setups
Table of contents
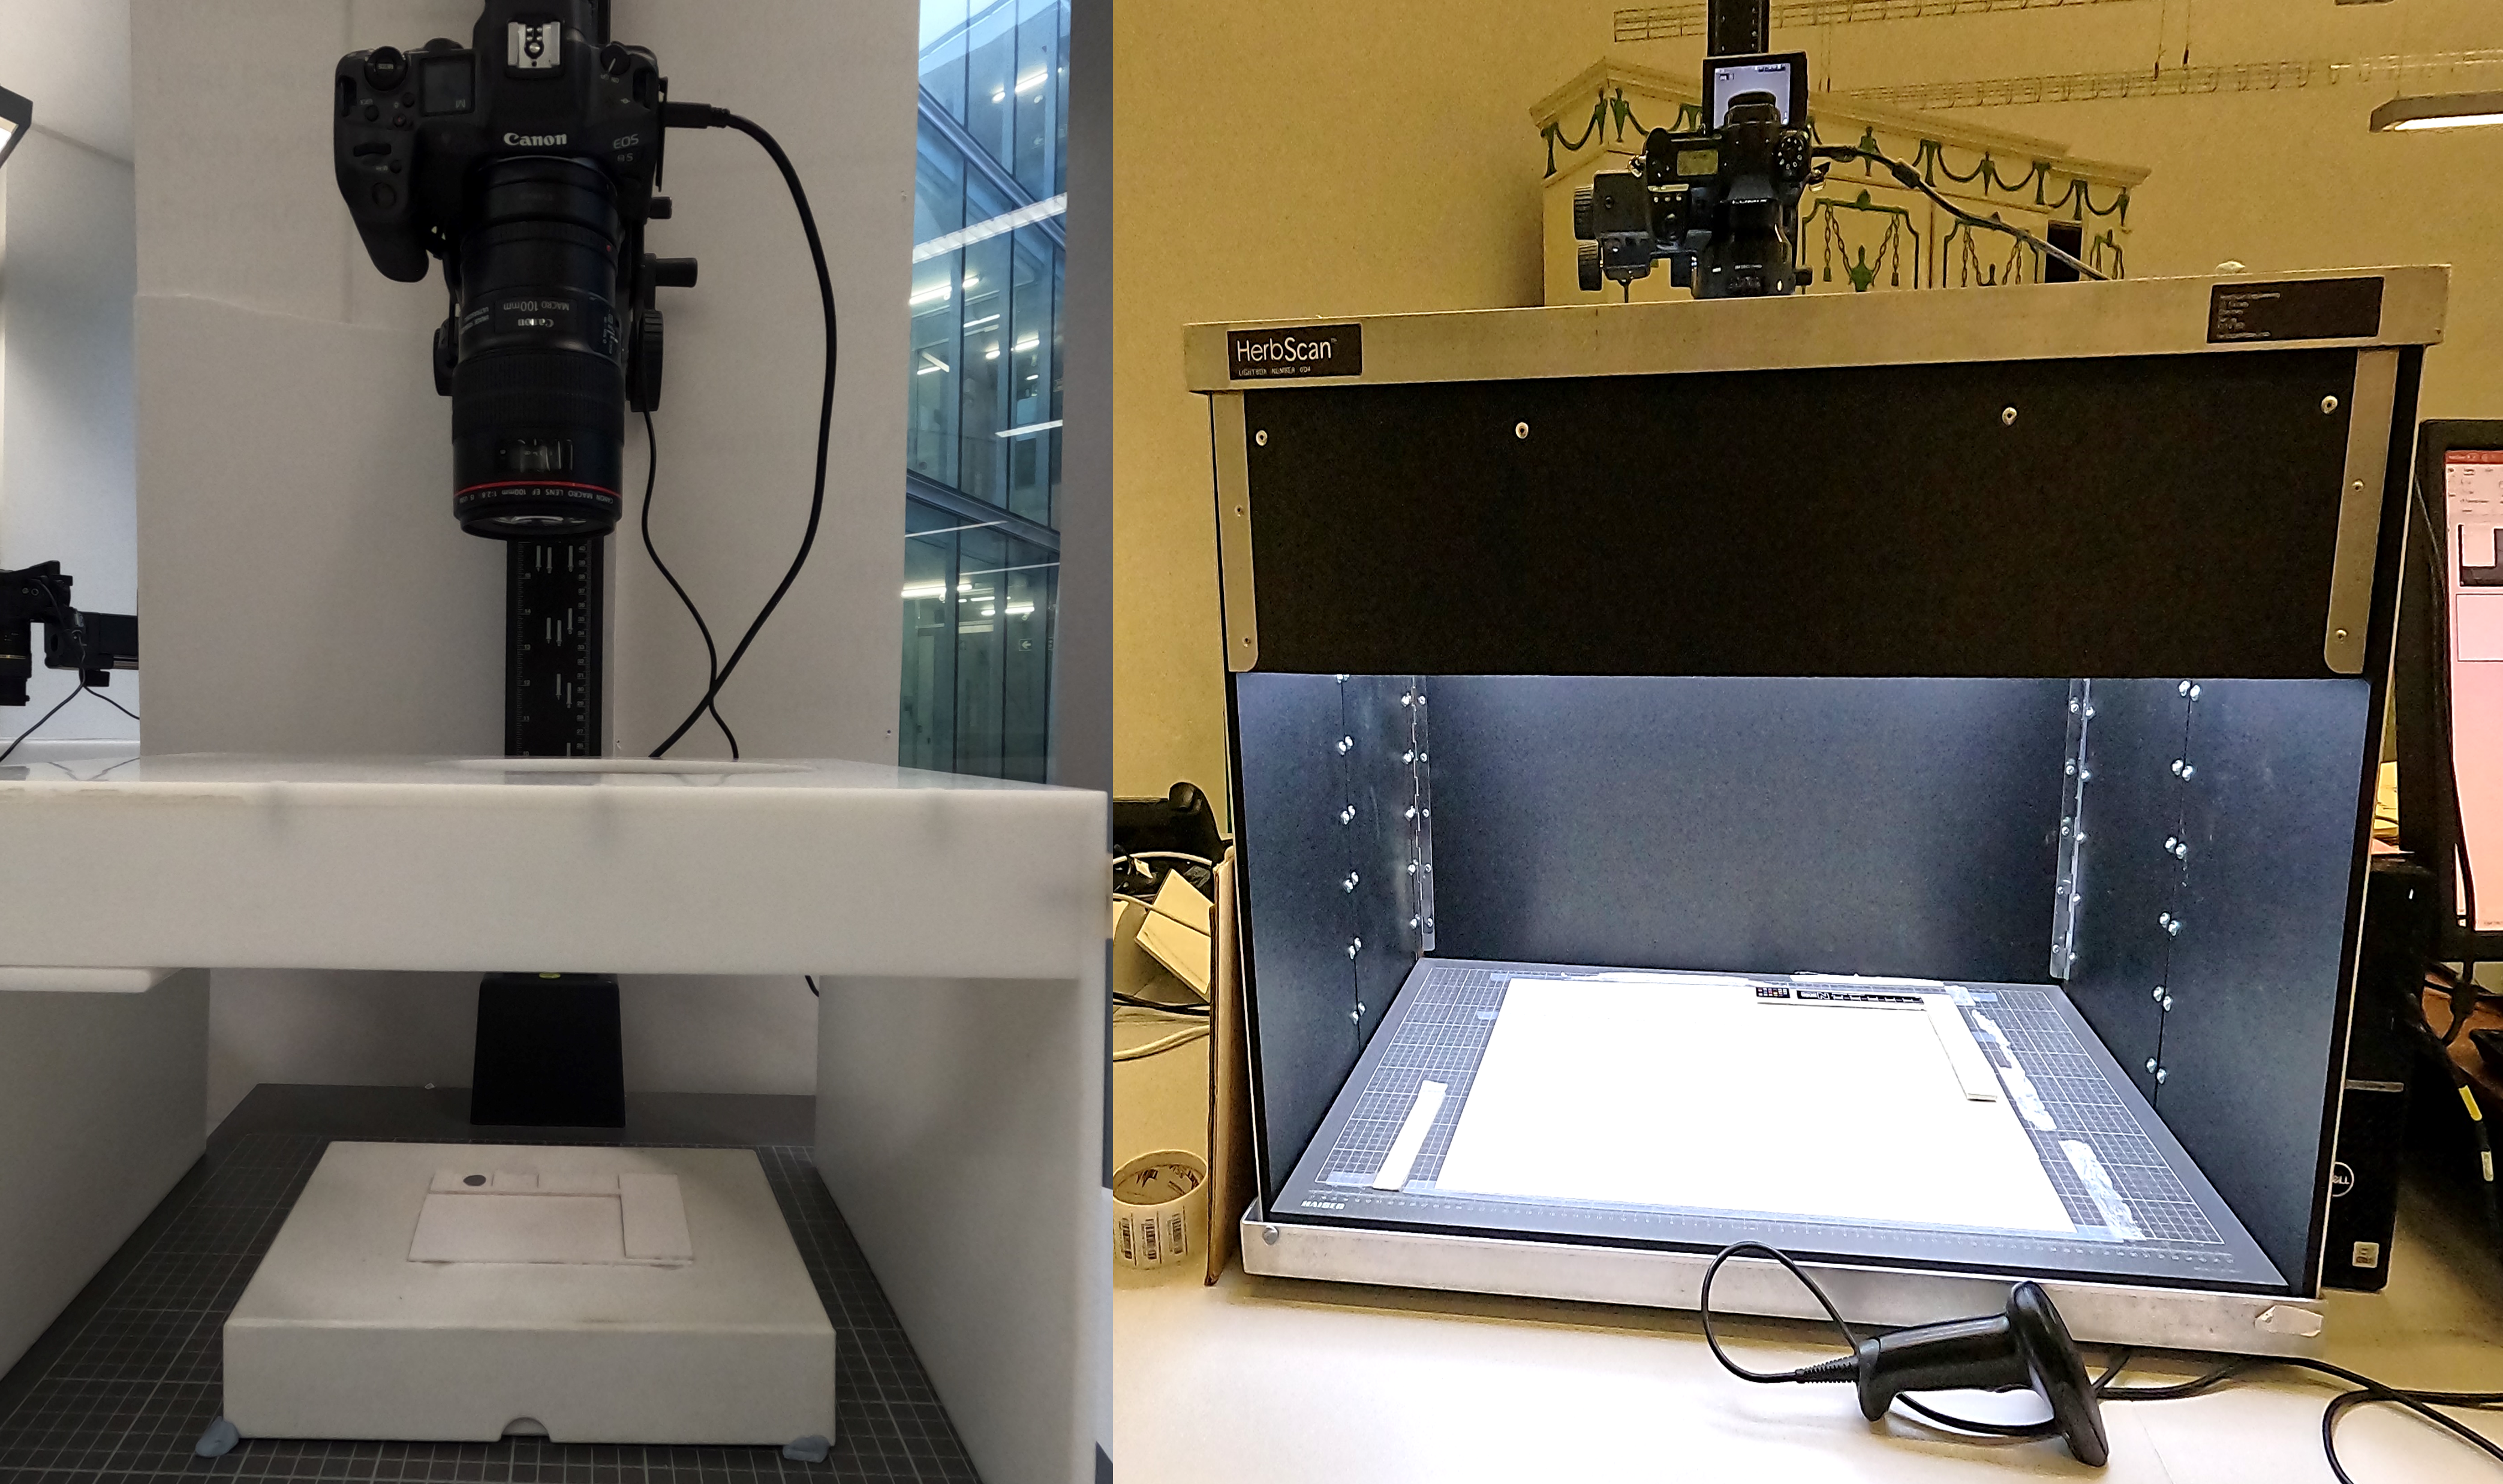
From the above sections you can see that there is a lot to consider when setting up specimen photography. A useful way to standardise and control your digitisation imaging is to have a dedicated set up and camera rig connected to a computer, for example:
 Figure 1: two imaging set ups for imagign different specimen types, on the left slide imaging, and on the herbarium sheets. The setups themselves are quite similar, with a copy stand fixing a single camera above a light box, into which the speimen is placed.
Set ups like these allows you to standardise the light in each image, avoid external or fluctuating light sources, have a consistent defined image size, a stable shot, and even a scale when the camera is a defined distance from the object. All these aspects make the images captured more consistent between days and setups and improve the quality of analysis that can be performed upon digitised images.
What to include in the photo?
When setting up your imaging setup you also need to consider what you would like to include in the photo. Here is a list of what you should be capturing in each image:
1) The specimen. Including the whole specimen (or as much as possible) in the image. Images should aim to be centred on the specimen and not have it cramped up to any of the sides. 2) Specimen labels. Labels contain all the additional metadata on the specimen and are vital to include. Often the label information is even more important than physical details of the specimen itself. Make sure they are readable. 3) Colour/white balance chart. To ensure than colours are standardised include a colour chart or a white balance chart. This can help correct photos to the correct balance later. If chart of not included then use a background of a known colour and shade to standardise images.
4) Scale. Include a scale so that the size of the specimen is known. This can be physical or can be added in later image processing if the camera is a known distance from the specimen. 5) Barcodes. If barcodes have been added to specimens make sure these are readable. These can be read by the computer, provide additional information, and help contrast digital databases. 6) Background. Make sure the background of the image is plain (white or grey) with no additional patterns. For specimens such as herbarium sheets the background will be the sheet itself which may have markings which is unavoidable.
Taking photos with the computer
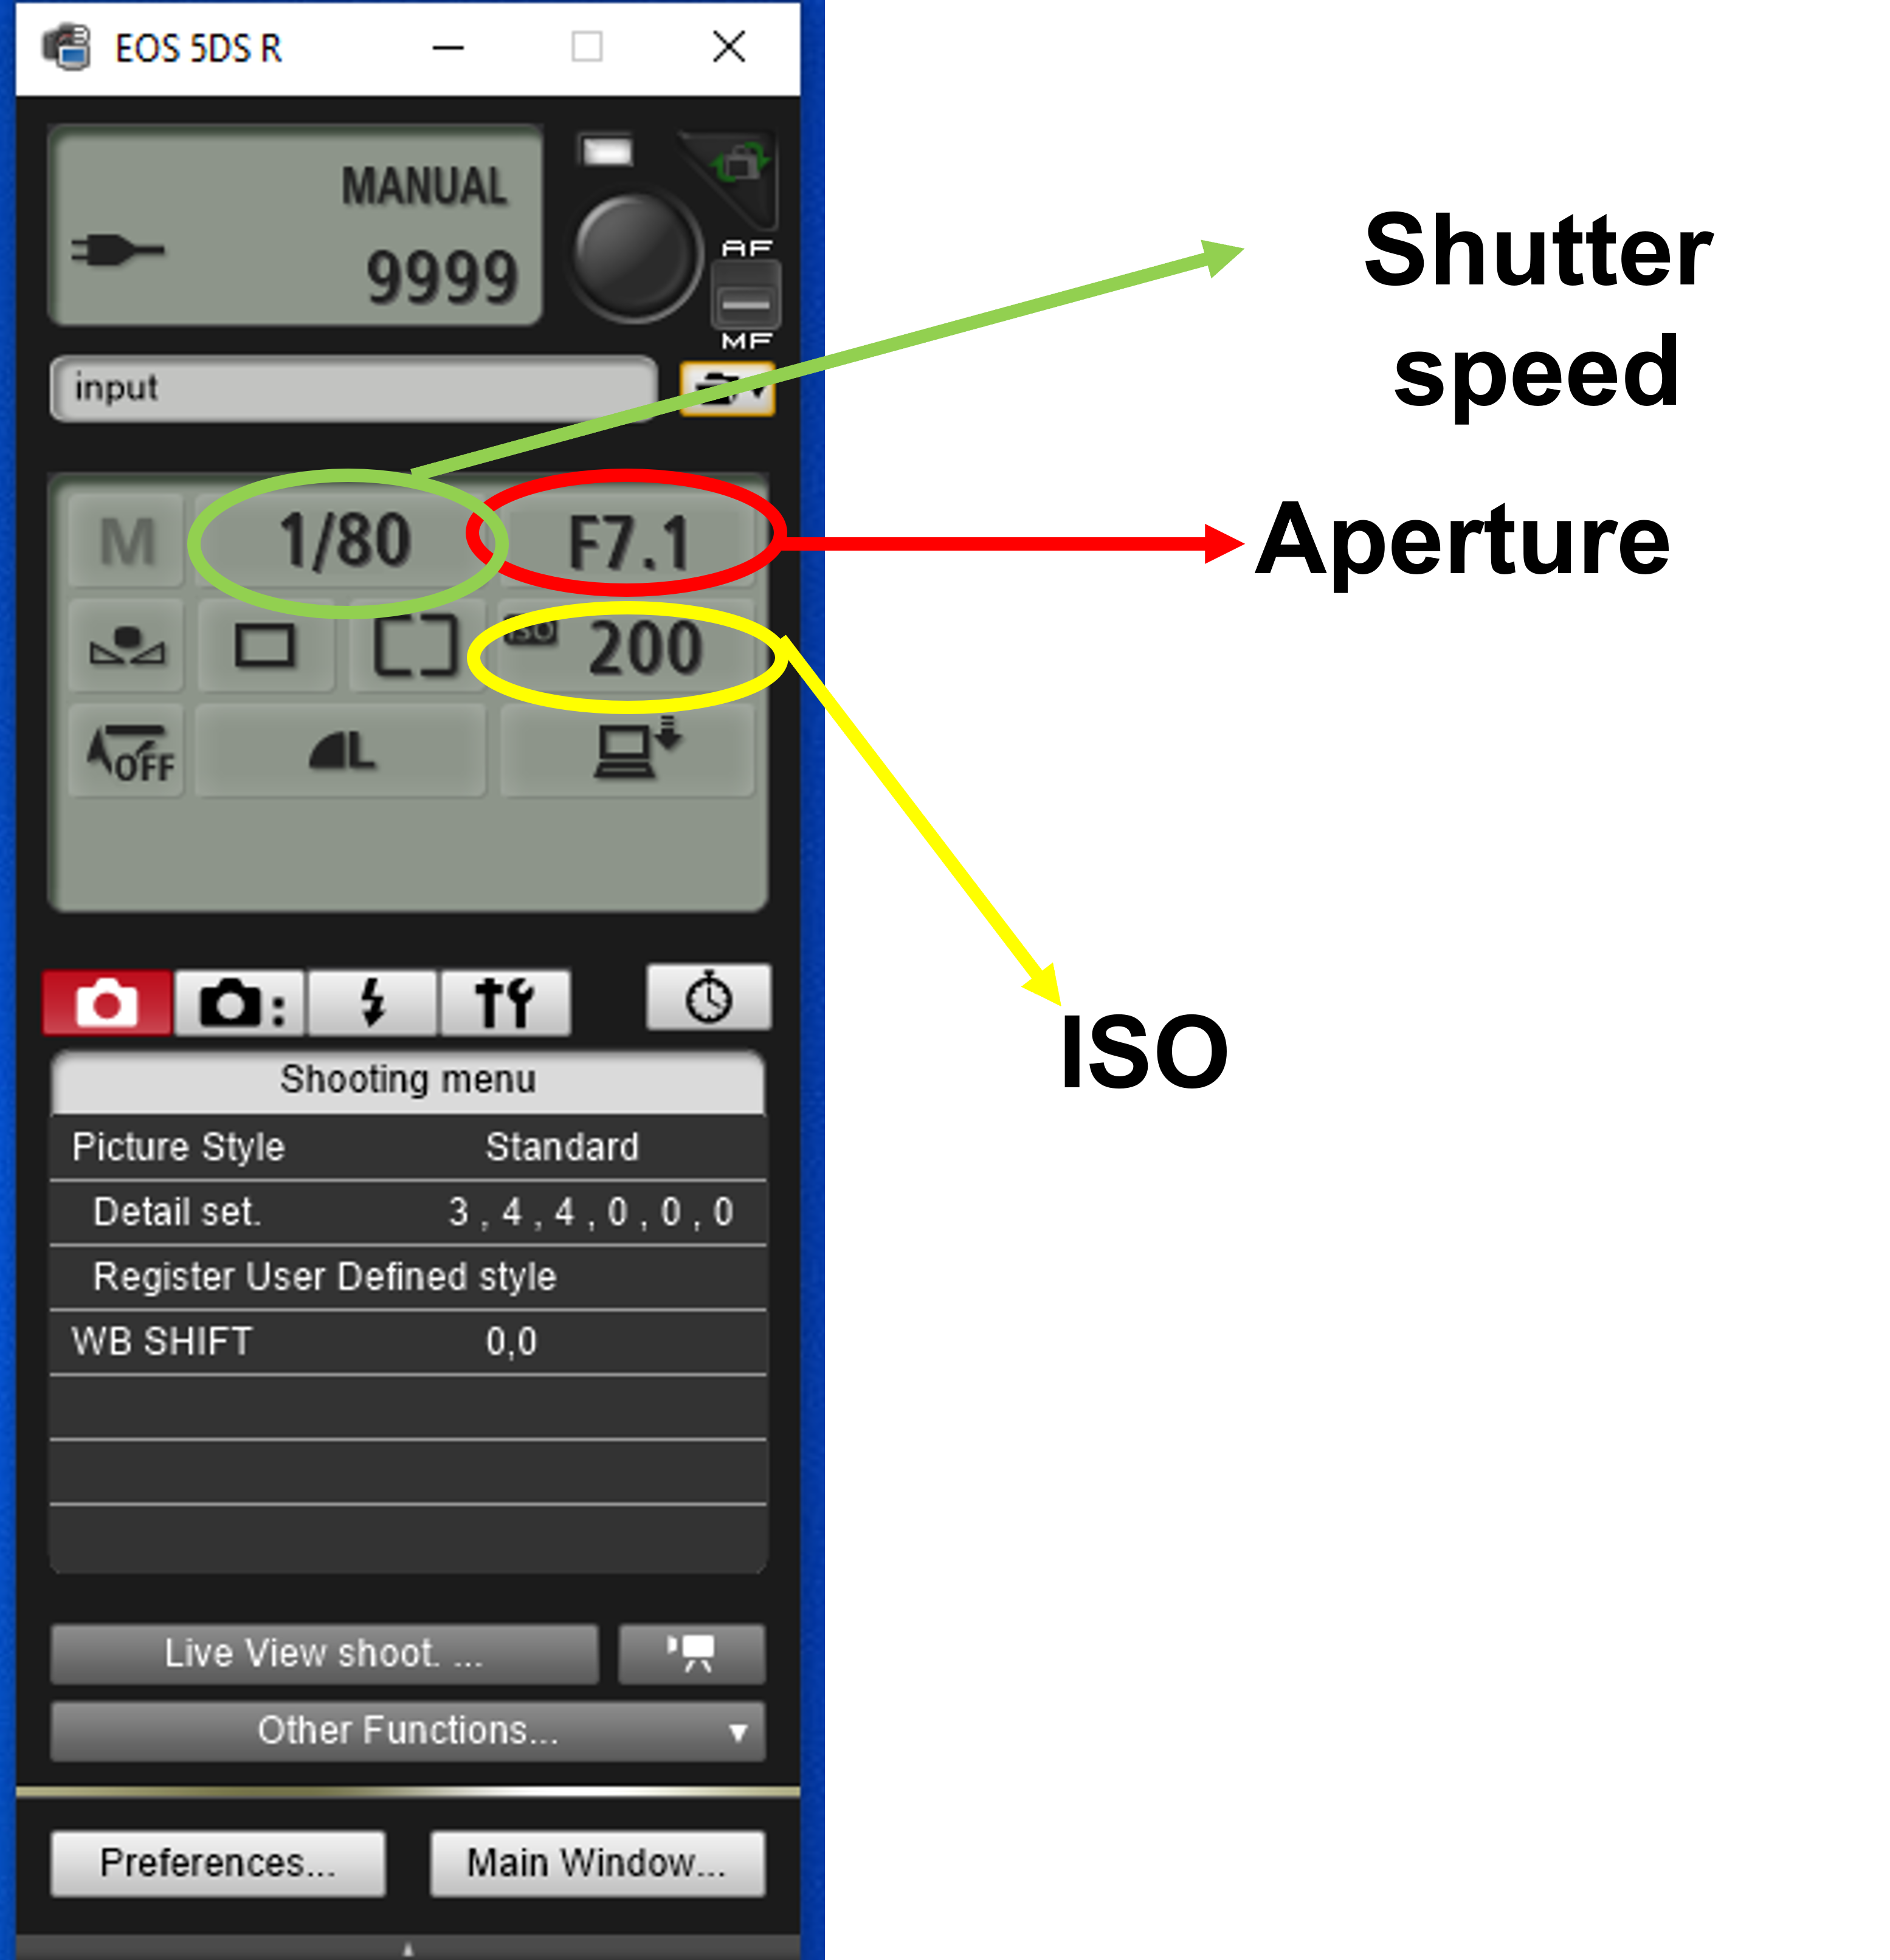
In most digitisation workflows images are captured using a tethering program on a computer. The camera and computer are linked using a cable. Most major camera brands have tethering programs that automatically launch when the camera is connected. An example of one is shown here:
 Figure 2: A close up of a tethering program window (for Canon EOS models). The three main controls, ISO, shutter-speed, and arperture are highlighted (Details of these later in the module).
The advantage of such programs is that the camera can be left untouched during the image capture process. Manual touching of the camera could inadvertently move the position of the camera or a change in settings. Photo settings can also be set on the computer which can often be clearer and more obvious to do than on the camera itself.
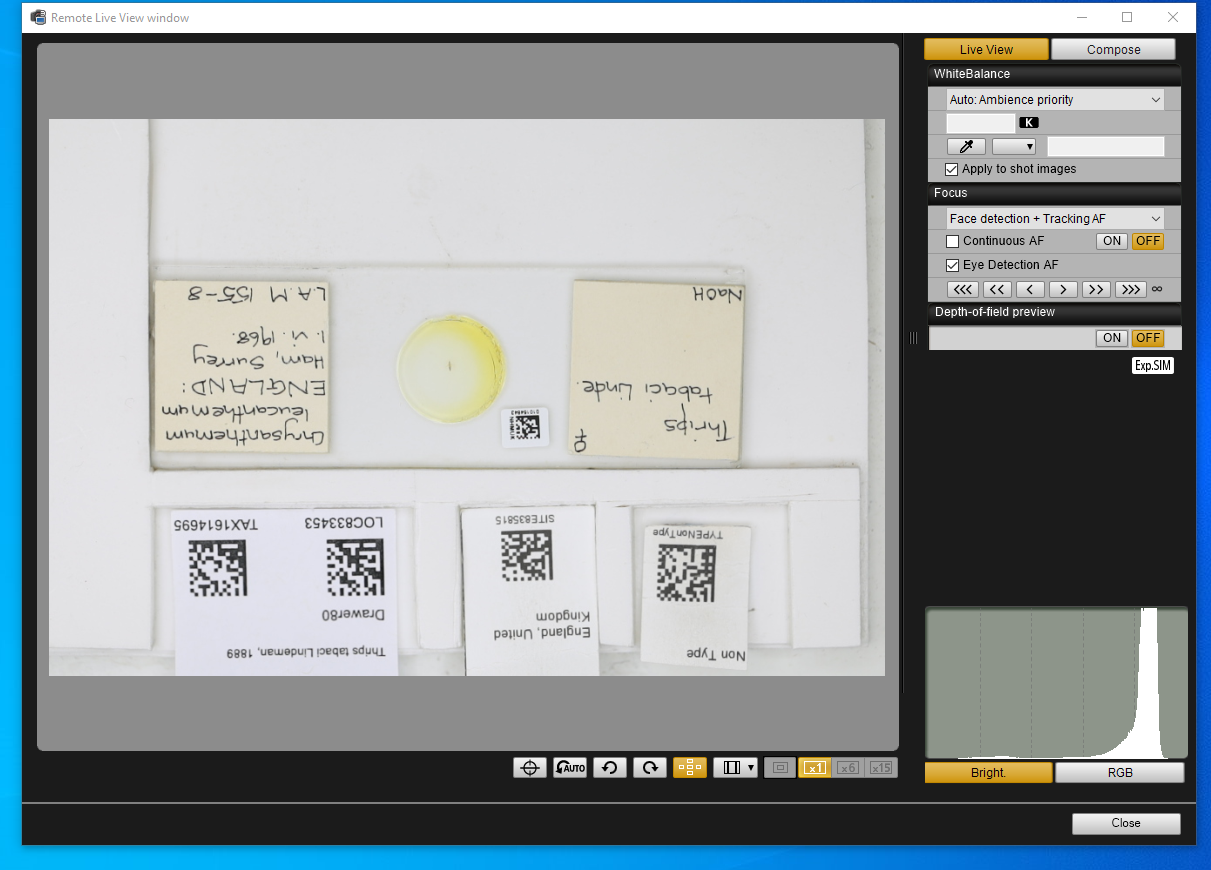
Finally, the ‘live view’ available on most tethering programs is useful for showing what the camera sees without looking through the lens. This is particularly useful when the camera is fixed in an awkward position, as is typical with photography rigs.

With the live view, we can look through the camera from the comfort of the computer screen which enables us to test the settings and framing of the image we are going to take.
Next page: 8. Automating image processing