8. Automating image processing
Table of contents
Photographs taken using a tethering program are automatically trasferred to a folder on your computer. We recommended to use a new folder for photos taken on a specific day to avoid confusion (name folders with the date). You can also keep track of the photos by ensuring that the number of photos in the folder is what you expect from the number of specimens that have been processed.
However, taking the image is only the first step in the digitisation process. We cover more in our module on data mobilisation but here we summarise a few approaches to automating aspects of image processing.
Barcode reading
Adding barcodes to specimens is a common approach in digitisation. Barcodes can be used to physically assign unique identifiers to specimens, as well as labelling physical storage (e.g., drawers, cupboards, jars) or used during digitisation to capture additional information about the specimen such as the name of the collector, country of collection, or type status.
Programs such as BardecodeFiler can read barcodes from images. It can use these rename files or create metadata files which can associate barcode data with image. For example, the image of slide below:
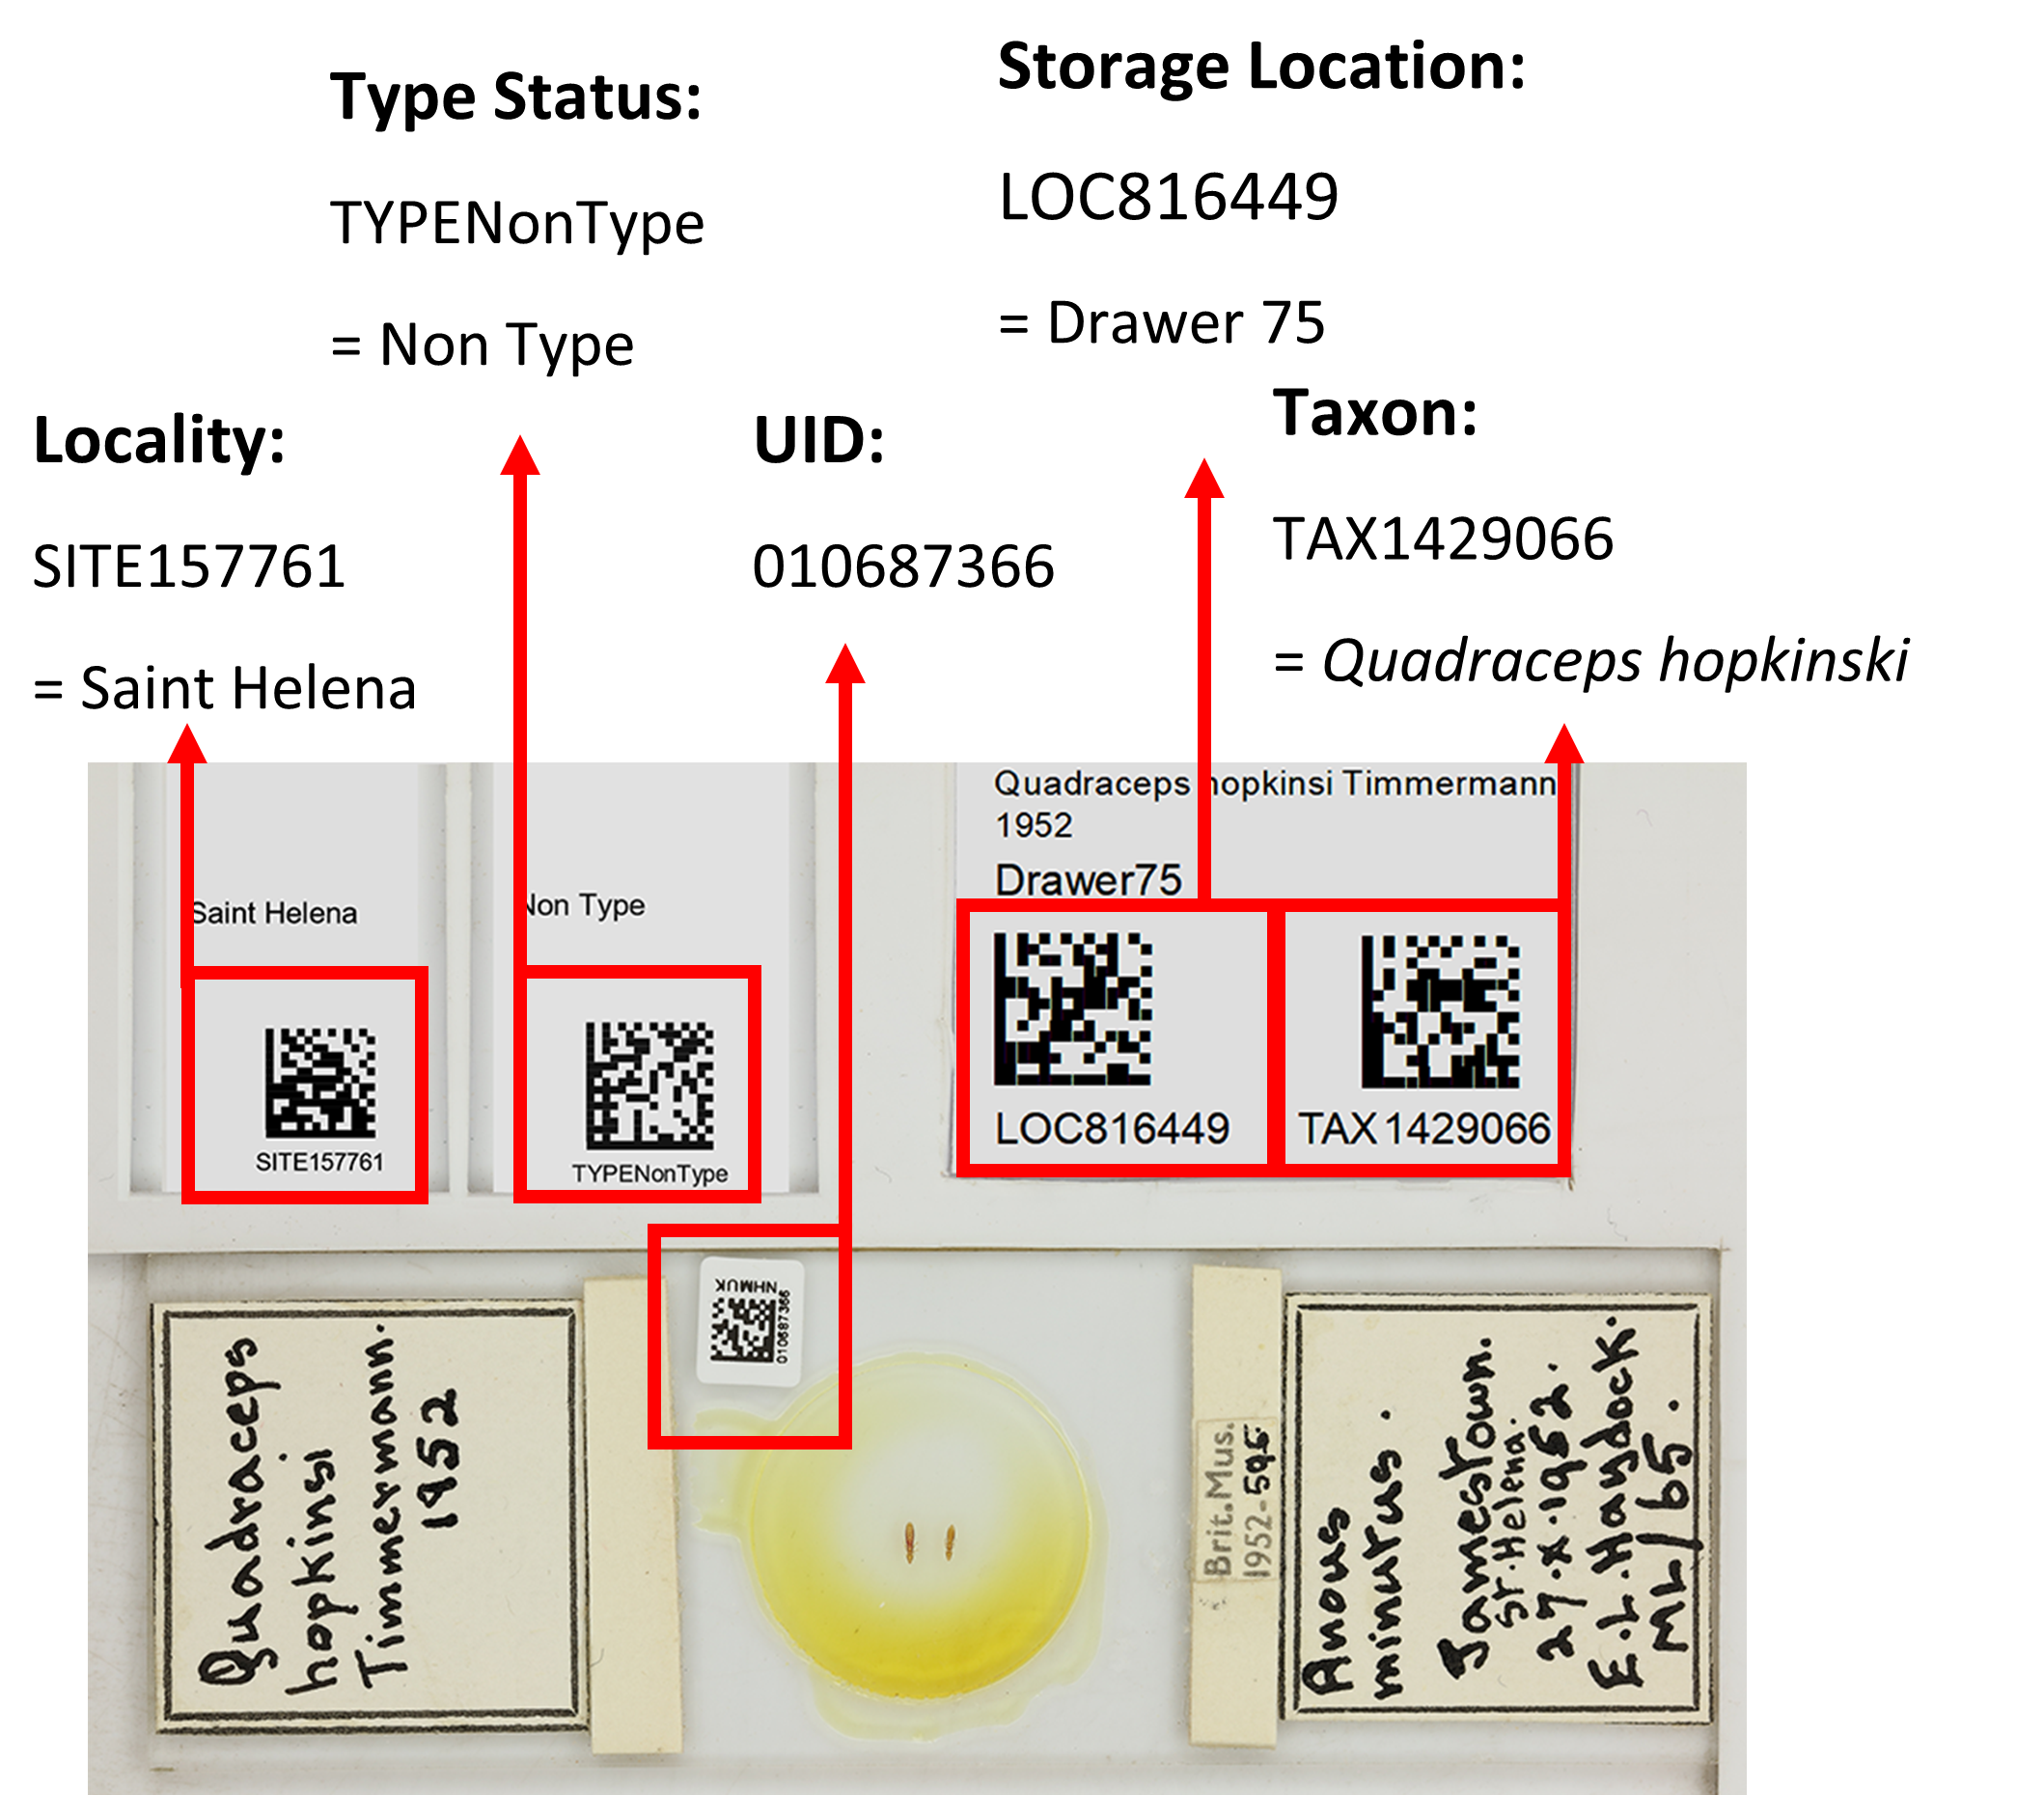 Figure 1: Slide specimen of the thrip Quadraceps hopkinsi showing all associated barcodes. Each barcode encode different metadata and is written into the filename of the image. When we import the images into our collections management system, these barcodes are read and used to update the corresponding specimen record.
By using ‘hot folders’ the process of barcode reading can be automated with each photo is passed to BardecodeFiler as soon as the photo appears in the folder. Bardecodefiler is also able to split barcodes when several specimens appear in the same image, for example:
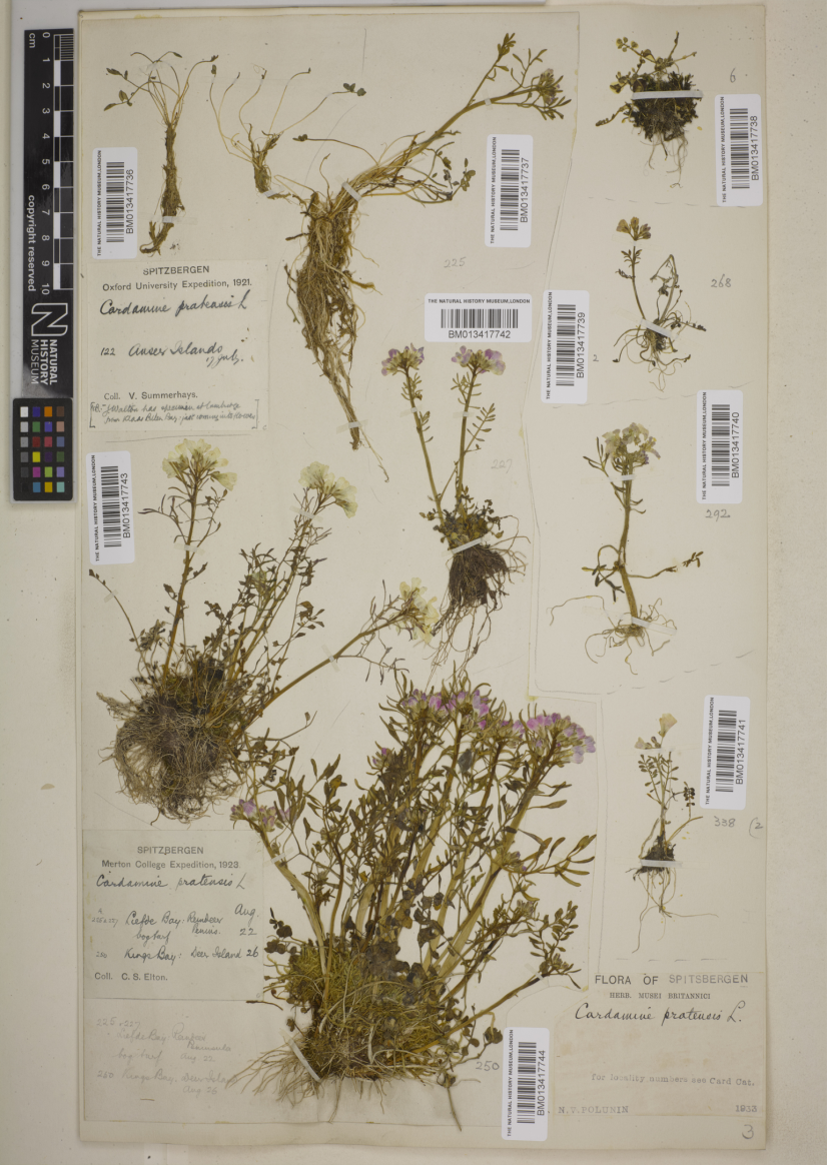 Figure 2: A single herbaium sheet with multiple specimens of Cardamine pratensis. To image each of these specimens independently would be difficult and time consuming. A barcode is attached to each specimen meaning that a single image can apply to several specimens.
Auto-cropping
Specimen photographs often contain extra information that we don’t want to publish like drawer numbers, storage location, bar codes etc. For example consider this picture:
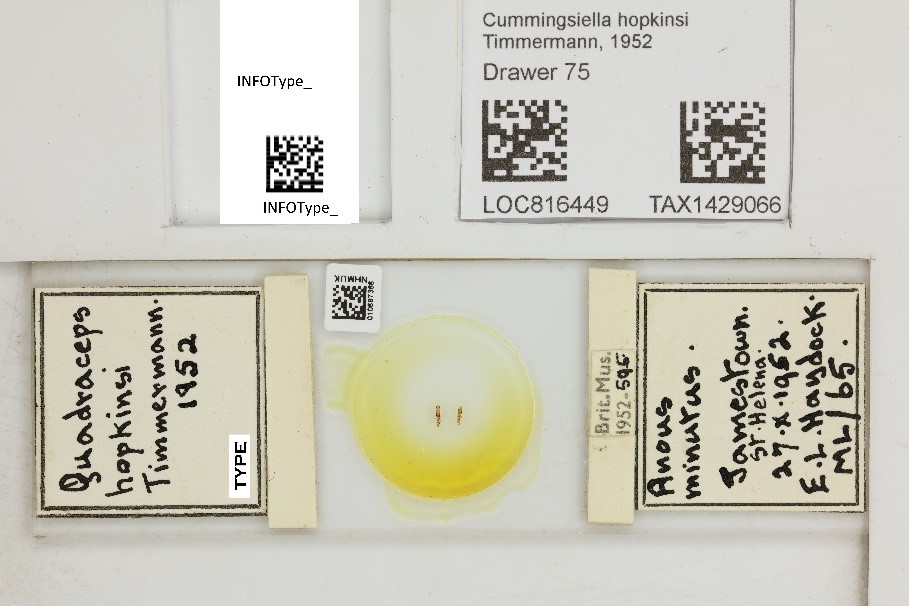 Figure 3: A slide specimen of the thrip Quadraceps hopkinsi as initially imaged byt he camera.
The information at the top of this picture is unnecessary or even a security risk as it the barcodes on the right include where the specimen is stored within the museum. Such sensitive information can be removed by cropping.
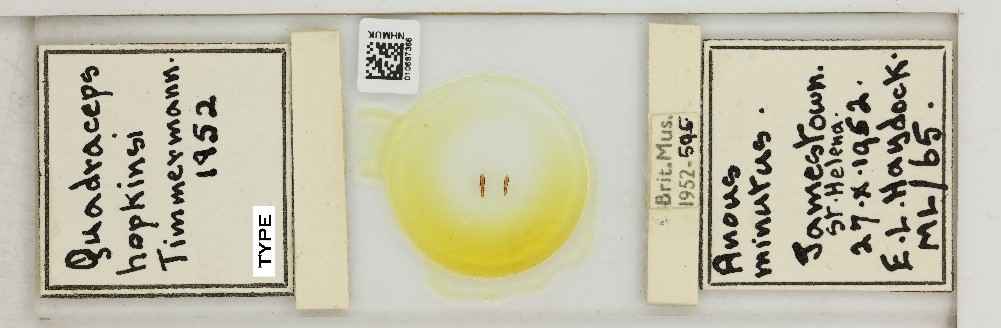 Figure 4: The same image shown in Figure 19, but passed through automated software to crop out barcodes. This image can be used for publication.
This process can be automated if images are in a series and the image size and the location of cropped information is standardised. The above example was performed using XnConvert and can automatically cut a specified number of pixels from each photo that is taken.
Automated text reading
A major area of interest for digitisation is the potential for automatic transcription and the reading of specimen label images using Optical Character Recognition (OCR) or Handwritten Text Recognition (HTR) software. This software-based approach works better with printed labels rather than handwritten ones but holds promise for future mass digitisation approaches and may be a valuable and time-saving feature in the future. Examples of OCR/HTR software: Tesseract ABBYY
Next page: 9. Materials and references