1. Introduction to specimen photography
Table of contents
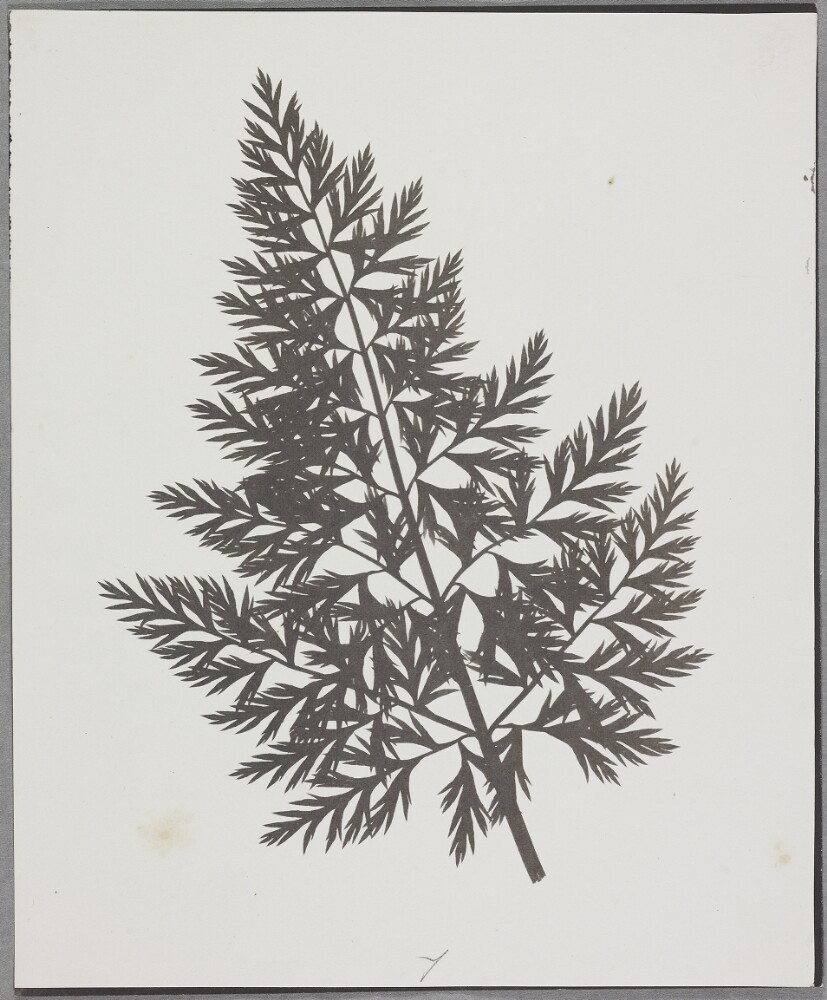
Photography is by far the simplest and widely used method to capture digital information about museum specimens. In fact some of the first photographs taken by camera pioneer William Fox Talbot in the were of botanical specimens which look very similar to those we take today.

Figure 1: Dried Umbelifer specimen on a herbarium sheet produced by photography pioneer William Fox Talbot (1840-60s). Image from The Talbot Catalogue- Oxford Univeristy.
Specimen photography (or macro-photography) typically involves taking either a single or multiple images of a specimen using a camera. The cameras involved typically don’t differ much from those that can be bought off the shelf with a focus on usability and cost effectiveness being important to deliver successful digitisation projects across collections.
The purpose of digitisation projects is to create a digital record of a specimen for data sharing, analysis, and cataloguing. A major part of digitisation is the creation of a visual image for each specimen. This image can then be stored and made available via an online portal which allows others, both within and outside our collections to access specimens without the need for direct contact with them. The digital image of the specimens also helps preserve it for prosperity and future generations in case the specimen is damaged.
While any photo, taken with any camera or setup, contributes to digitisation efforts, not all provide the same degree of useful information. When producing specimen images for digitisation we need to ask ourselves ‘why are we taking this image?’ The information about the specimen that we want to capture affects the type of image we should create.
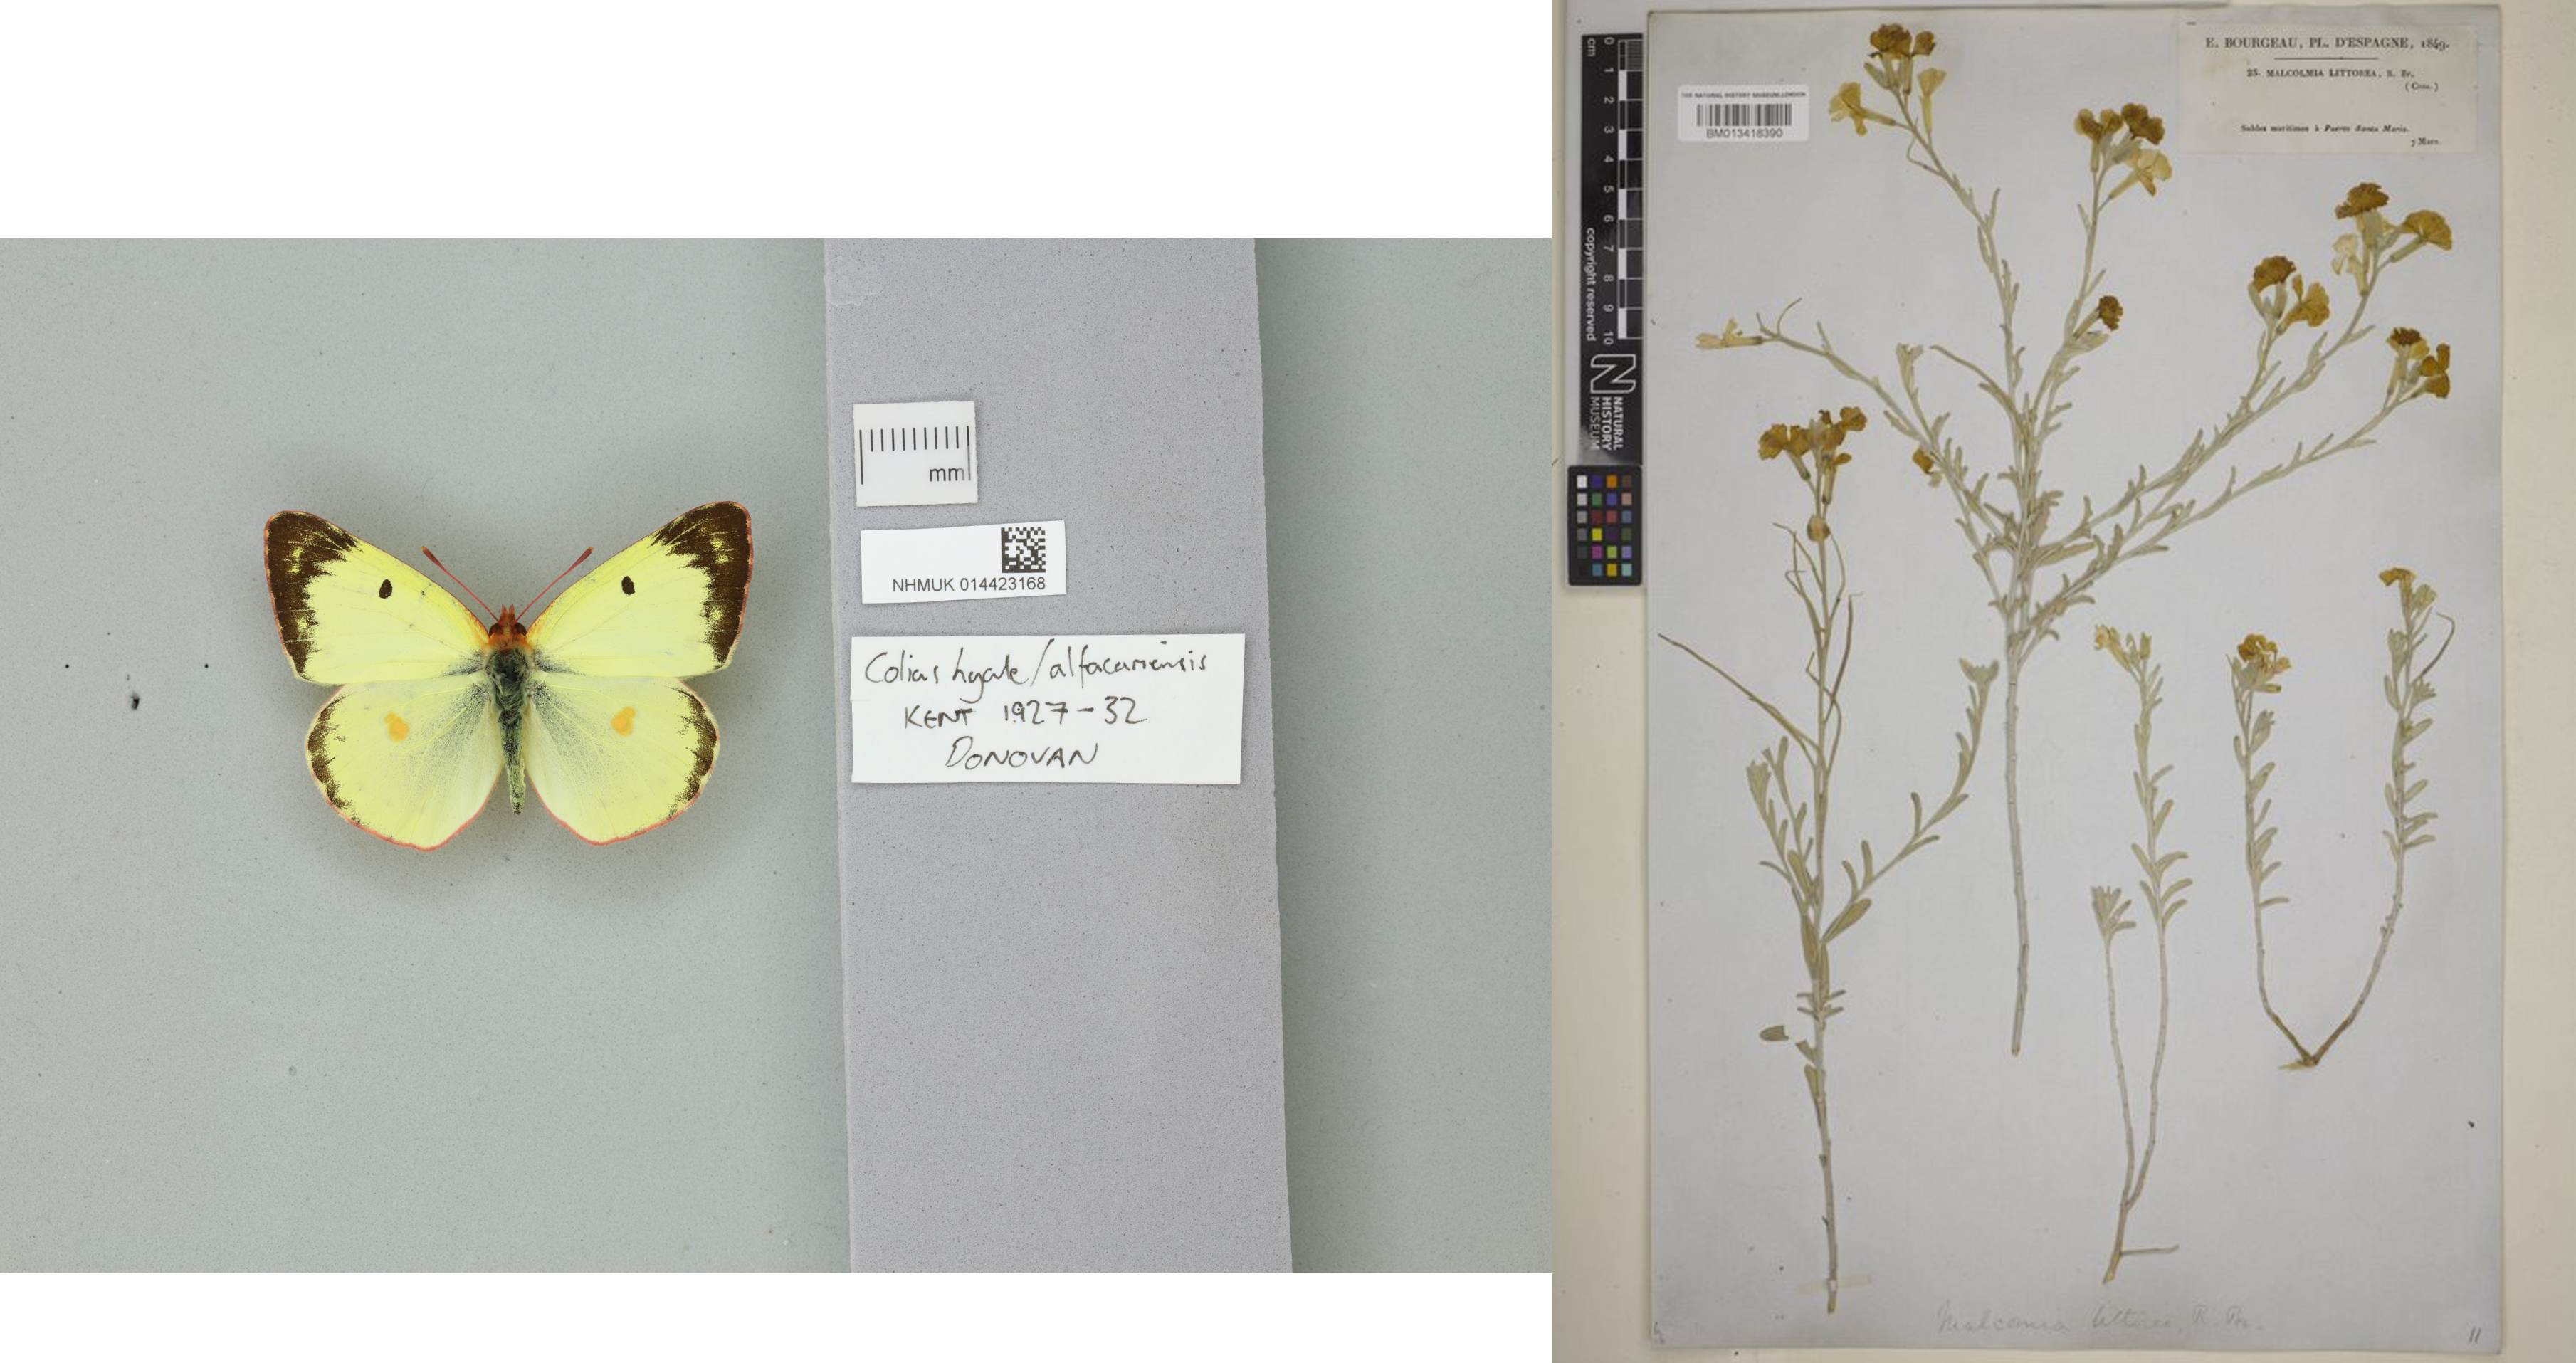
In digitisation we want to produce an image of high quality and standardisation which captures as much detail about the specimen as possible. This includes colour, morphology, date of collection, species, and additional label information. The more aspects of a specimen that can be, the more information can be extracted about the specimen without the need to handle the specimen itself. Including label data in the image allows more of the information connected to a specimen to be kept together and this simplifies later analysis.
 Figure 2: Good examples of specimen images. On the left, a pinned specimen of Colias hyale, and on the right a herbarium sheet of Malcolmia littorea.
The aim of this module is to provide a general background to the use of photography for digitising museum specimens. We give an overview of many aspects of photography, from camera set up to automated photo editing. This module also introduces and explains many of the jargon terms in the photographic workflows detailed elsewhere on this site. The aim is for users to be familiar with technical terms used in workflows and understand why certain settings/specifications are recommended. The core message is that you do not need to be a photography expert to produce good digitisation images of your specimens, but a grasp of basic ideas will aid in workflow implementation, help you to understand the photography process and help resolve issues that may arise.
Photography as means for specimen digitisation is most efficiently applied to small or reasonably flat objects like herbarium sheets (link when ready), microscope slides, or pinned insects. Each specimen type usually requires different set ups to produce the best picture of the specimen. However, with all the specimen types the aim of photography is still the same: to produce the highest quality and most informative digital image of a specimen that can be stored and distributed in a replicable and cost-effective manner.
Following this page we have a series of modules which take you through various aspects of digital photography. This is not an exhaustive review, but should help those of you who are new to photography with your digitisation projects. If you’re interested, additional links are provided on the final page.
Next page: 2. Cameras - what to use?